Before carp fishing near snags, ask yourself whether you can reliably land a fish from that spot. Strong tackle won't make an impossible swim safe. We'll look at space, indication and control—and when to leave the spot alone.
A fallen tree, root system, reed bed, island margin, mooring chain or sharp shelf can all become a snag, but they don't present the same risk. Map what is beneath the surface and consider the angle of the fight, not merely where the hookbait lands. A carp swimming away from you may reach branches that seem several metres beyond the bait before an indicator moves.
Carp fishing near snags: can you land the fish safely?
Only cast where you have a realistic chance of landing nearly every fish hooked. Remain close enough to reach the rod immediately and never leave a baited rod unattended. Keep the landing route clear, assemble the net and unhooking equipment before casting, and know how to contact the bailiff if a carp becomes tethered or inaccessible.
Use a lead system designed to reduce the consequences of a break or a lead lodging in debris. It must be assembled from compatible components according to the maker's instructions and the fishery's rules. “Drop-off” is not a licence to deposit leads unnecessarily, and a lead clip doesn't compensate for weak main line, a jammed leader knot or fishing too close.
Your stop rule matters most. After one fish reaches the obstruction, or one unexplained cut-off suggests sharp material, inspect everything and increase the buffer. If the cause cannot be understood or a second fish is lost in the same way, stop fishing that line. Catch rate never justifies a pattern of tethered or damaged carp.
What counts as a snag?
Visible branches are only the obvious part. Submerged roots may extend well beyond the canopy, and a fallen tree can have limbs under the line that cannot be seen from the bank. Reed stems and lilies can fold around line, while dense weed can hold a lead and fish even though it eventually pulls free.
Man-made hazards include platforms, retaining wire, fence panels, shopping trolleys, bridge supports, marker ropes, aerator cables and old moorings. Gravel bars and concrete shelves may not trap a fish but can abrade line where it crosses a sharp edge. Another angler's lines can become an obstruction too.
Classify the consequence as well as the material. Soft weed that parts under controlled pressure is different from an enclosed root ball. An open reed margin may allow side strain from a neighbouring swim with permission; an island corner may leave no safe change of angle. If the fish cannot be approached or guided out, allow a much greater buffer or choose another spot.
How to decide if a carp snag is safe to fish
Observe the water in daylight and speak to the fishery team. Ask whether ropes, old trees or sharp objects lie beneath the surface, where previous losses occurred and whether any areas are prohibited. Local information can reveal hazards no marker lead will identify safely.
Use feature-finding tackle only where casting and retrieving it will not catch the snag. A bare lead drawn slowly along a safe line can reveal weed or a shelf; repeated dragging into branches simply adds tackle to the problem. Our guide to using a marker float explains measured depth and bottom checks.
Work out the direction a hooked carp is most likely to take and where side pressure can be applied. Check the near margin and landing area as carefully as the far snag. A clear hookbait spot is no use if every fish must cross a sunken branch beside the net.
Record a safe maximum distance with wraps and choose a distinct directional marker. Treat that as a boundary, not a target to creep beyond after a quiet hour. Wind, casting error and lead swing can all put the rig closer than the number suggests, so build in a margin.
How far should I fish away from snags for carp?
There's no universal number of metres. The necessary buffer depends on indication delay, line angle, depth, stretch, fish size, the direction of the carp's first movement and how quickly the angler can take control. Five metres of open water may be generous in one margin swim and wholly inadequate at long range with a bow in the line.
Begin much farther away than you think is essential and learn how the setup behaves. If every hooked fish is brought under control with room remaining, a small change may be considered in daylight. If a fish reaches weed or brushes the obstacle, move back immediately. Don't learn the minimum distance by sacrificing fish.
At range, indication arrives after movement has transferred through the line and any stretch. The carp may also move sideways rather than directly away from the rod. A snag that sits beside the bait can therefore be more dangerous than one directly behind it. Draw an imaginary circle around the hookbait rather than measuring only a straight line to the branches.
Choose balanced tackle, not simply the strongest item
Main line, hooklink, knots, rod and reel must work as a system. Follow the fishery's minimum diameter and leader rules, then choose abrasion-resistant line appropriate to the water. Replace any section that feels rough, flattened or nicked. The breaking-strain guide explains why diameter and condition matter alongside the number on the spool.
A hooklink dramatically stronger than a damaged main line can leave more tackle attached after a break. Conversely, a deliberately weak hooklink beside a hard snag risks leaving a hook in every fish. There's no responsible “sacrificial” shortcut. Use sound compatible material, pull-test knots with proper tools and fish only where the balanced setup can land carp.
The rod needs enough reserve to apply steady side strain, but a very stiff blank cannot make an enclosed snag safe. Set the reel clutch firmly enough to prevent an unchecked first run while the rod is in secure rests. Don't lock the spool so absolutely that the rod can be pulled in or the line parts before you reach it.
Once the rod is in hand, control pressure through the bent blank and clutch. Adjust only when you understand the margin available. A free-spool or baitrunner system can be set firmly for a snag situation, but verify that it engages correctly and that the main clutch is ready for the fight. The carp reel guide covers drag and free-spool functions.
Secure the rods and alarms
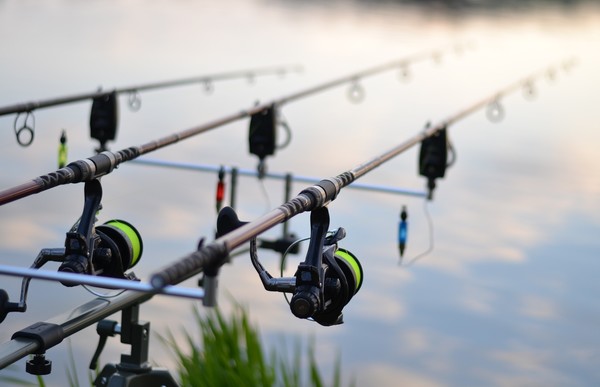
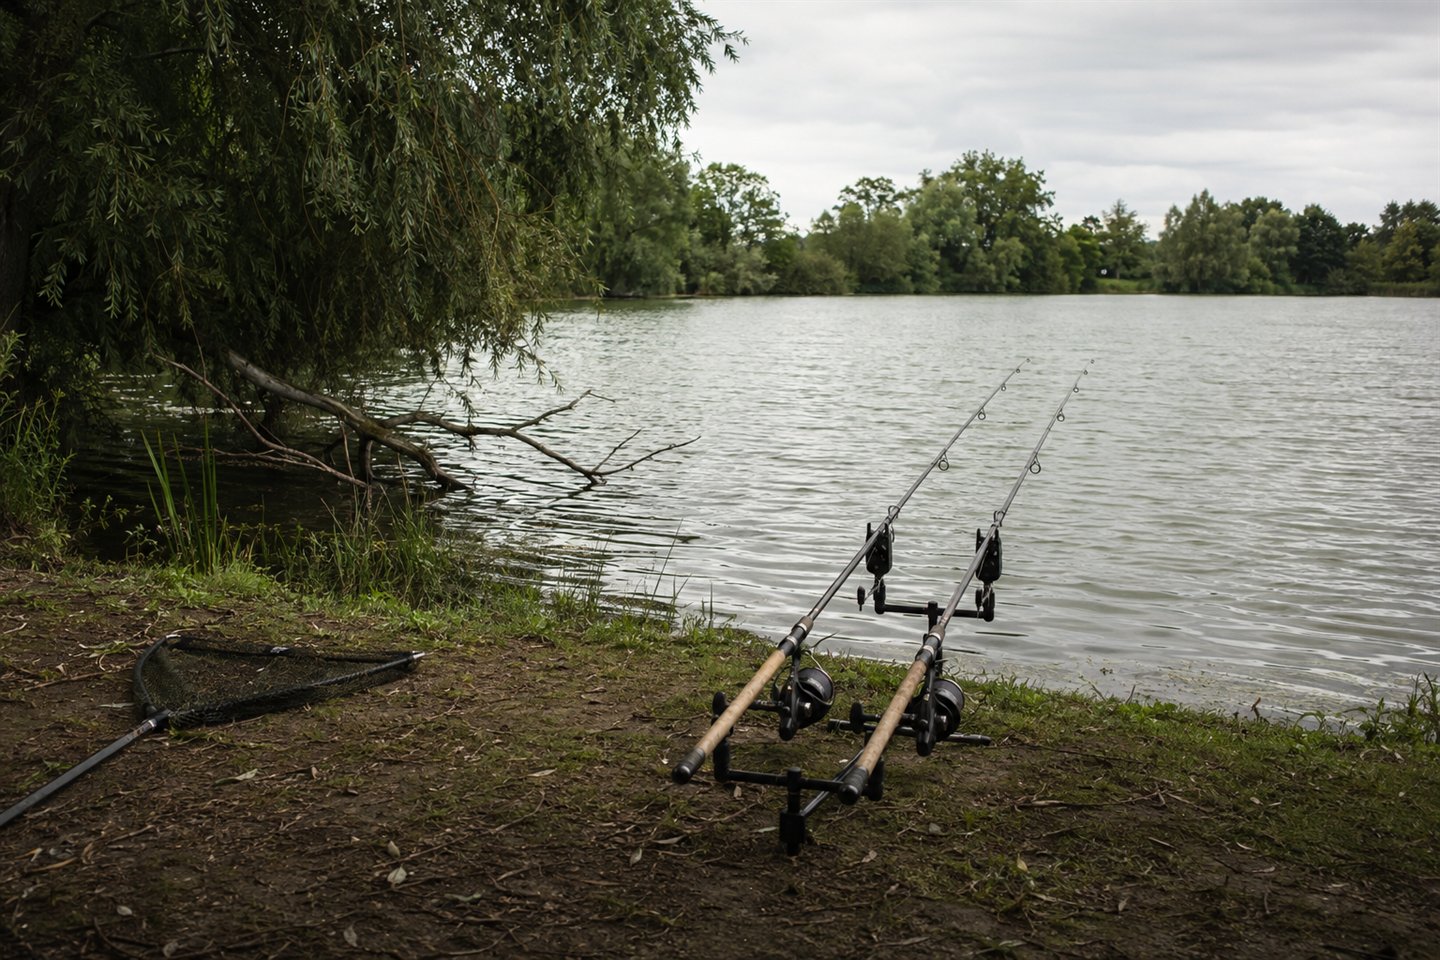
Use solid banksticks, goalpost-style rests or a stable pod suited to the ground. Butt grips should retain the rod during the initial pull while still allowing it to be lifted promptly. Push sticks deeply enough that they cannot rotate and test the setup by pulling the line from in front under controlled pressure.
Pointing the rods towards the rig can reduce lateral pressure on alarms and improve direct contact, but the bank and other lines determine the safest arrangement. Keep bail arms closed, reels correctly seated and alarm rollers clean. A remote receiver is supplementary; it doesn't make it acceptable to leave the swim.
Set bobbins or hangers to show small forward and drop-back movements without adding excessive resistance. Test the alarm by walking the line gently from the safe margin. Volume alone is not indication quality. The rod, line and indicator should reveal movement early enough for the chosen buffer.
Tight lines, rod position and line angle
A reasonably tight line gives faster indication and reduces the distance a carp can travel before movement reaches the alarm. Slack-line fishing close to a serious snag can allow a fish to gain the obstruction before the angler knows it has picked up the bait. Sink only the line you can keep under effective contact.
A tight line running over a sharp bar can also be dangerous, so map the path. Raising the rod tips may lift line over a near shelf; lowering them may keep line away from boats or surface debris. Choose the angle that avoids contact and still lets you apply pressure in the required direction.
Choose a fish-safe lead arrangement
A lead lodged in roots or weed creates an anchor. A properly configured lead clip or helicopter system may release the lead when necessary, helping the carp rise and reducing one snagging point. Whether release is desirable depends on the actual hazard and fishery policy.
Lead clips rely on correct swivel retention and tail-rubber fit. If the swivel is not seated, the force needed to push the tail rubber off may never develop; if the rubber is rammed on too tightly, the lead may remain trapped. Use matching parts and follow the current instructions for that exact clip.
Helicopter arrangements need a top bead that can move or release after a main-line break so the hooklink is not trapped behind a leader knot. Inline leads must also be able to separate where the chosen setup requires it. Tubing, leaders and knots change the escape path, so test the assembled system rather than viewing each component alone.
No lead system is completely risk-free, and losing the lead doesn't make the hook or line harmless. The fundamental protection remains fishing far enough from the snag, with sound line, immediate response and a high probability of landing the carp.
Rig and hookbait choices near snags
Use a rig you understand and can inspect. Shorter hooklinks can produce prompt contact, but they must still settle on the lakebed without the lead pulling the hookbait into debris. Coated braid or a combi arrangement can resist tangles while retaining movement near the hook.
Choose a strong hook pattern in the permitted size, inspect the eye and replace any point that is burred or turned over. Avoid components that can catch branches without adding a clear benefit. A simple knotless-knot hair rig is often easier to assess than a complicated arrangement copied without understanding.
A bottom bait, wafter or low pop-up can all work if the bottom suits them. Test buoyancy with the actual hook, and protect the point in light debris with a small PVA parcel where appropriate. The hookbait decision doesn't alter the safe distance from the snag.
What to do when you get a bite near a snag
Stay positioned so the rods can be reached without climbing over a bedchair, door or loose tackle. At sustained movement, lift the rod promptly and establish controlled contact. Disengage the free-spool mechanism if fitted, keep the rod bent and move into the planned angle.
Apply firm, steady side strain away from the snag rather than striking violently upwards. A low rod angle to the opposite side can turn a fish more effectively than simply pulling backwards, but keep line away from marginal rocks and platforms. Wind when the carp moves towards you so no slack develops.
As soon as the fish reaches open water, reassess the clutch. Continuing with near-locked pressure can tear a hook hold during a sudden close-range lunge. Give line under control and use the rod's curve. The aim is early direction near the hazard followed by smooth fish playing, not maximum force for the entire fight.
Other rods may need to be reeled in if lines cross the route. Decide this before fishing and keep the swim tidy enough that a companion can help without touching the active rod. Never hand a loaded rod to somebody who doesn't understand the snag or clutch setting.
If a carp reaches weed or becomes snagged
Stop and distinguish moving weed from a fixed obstruction. Keep steady pressure and watch the rod tip. A fish in weed may kick, move slowly or bring a mass towards you. A line rubbing a branch can feel locked and then change angle sharply. Don't jerk repeatedly, because sudden peaks can cut line or enlarge the hook hold.
If controlled pressure doesn't work, seek the bailiff or an experienced fishery representative immediately. Some managed waters have an authorised boat and trained staff. Don't launch or borrow a boat without permission, and never enter deep or unknown water. A lifejacket and competent help are essential where an authorised recovery boat is used.
A change of bank angle may free line on an accessible water, but obtain permission before entering another swim and keep communicating with nearby anglers. Don't climb trees, wade around roots or step onto unstable platforms. Human safety takes priority over tackle and any fish.
A deliberate pull for a break is a last failure, not a routine solution, because it may leave a carp attached to line and terminal tackle. Escalate early while the line still provides contact. After any incident, stop and identify what must change before another rig is placed in that area.
Hard snags are different from weed
Weed can sometimes part or move with sustained pressure. Branches, wire and masonry do not. Advice about patiently bringing a weeded carp towards you must not be transferred blindly to a fish wrapped around a fixed object.
A dense weedbed can still become lethal when old line, branches or sharp rubbish lie inside it. Treat unknown weed conservatively. If several fish become stuck even though they are eventually recovered, move the rig and reduce the problem rather than accepting the pattern.
Hard snags need a larger buffer and an even clearer landing line. Enclosed root systems and undercut banks may be unfishable from a given swim. Being able to cast into a hole doesn't mean a carp can be brought back through it.
Snag fishing at night
Night removes visual information and slows movement around the swim. Establish every distance, hazard and rod angle in daylight. Clear the route, illuminate steps safely and keep footwear, headtorch and net immediately available. If the setup depends on seeing a carp turn beside a branch, reel in before darkness.
Remain close to the rods and awake enough to respond. Remote alarms don't justify sleeping in a vehicle or visiting another swim. If tiredness, weather or medication makes prompt response uncertain, move the rigs into open water or reel in.
Fog, heavy rain and rising water can hide or change hazards. Branches may drift into the line and platforms can become slippery. Reassess after any material change rather than relying on the map made in the afternoon.
Fishing several rods near hazards
More rods create more lines to cross and more choices during a bite. Place only the number you can control, within legal and fishery limits. One rod fished well near a snag is safer than three spreading lines across the escape route.
Angle other rods away from the expected fight and keep enough separation to lift the correct one without catching alarms or indicators. If one fish is landed, reel in any rod that prevents safe netting. Catching a second carp is not a benefit if the first cannot be handled properly.
Never leave one snag rod while playing a fish on another. If simultaneous control is unrealistic, move the additional rig into open water. The same applies when photographing or weighing a carp: all baited rods must remain attended and under control.
Prepare the landing and fish-care area
Assemble the landing net, wet unhooking mat or cradle and place forceps, water and a suitable sling before the first cast. Choose a level route from water to mat without roots, steep steps or equipment. The excitement of stopping a fish at the snag should not be followed by an improvised landing.
A carp played firmly may need time to recover in well-oxygenated water. Keep it upright in the net while the unhooking area is confirmed, without retaining it for photographs or recasting. Support its body during transfer and minimise air exposure.
Inspect the mouth and body for damage and use only fishery-approved care products where permitted. Examine the entire main-line section, leader, hooklink, knots and hook before deciding whether anything can be reused. Abrasion may be visible as whitening or felt as roughness between damp fingers.
When should I stop fishing a snaggy carp swim?
Don't cast if the snag is unknown, the landing route is blocked, the fishery prohibits the tactic, or the tackle cannot be balanced to the rules. Don't start if you can't remain with the rods or contact help. Those are pre-cast stops, not problems to solve after a take.
Move the rig farther away after any contact with the obstacle, unexplained cut-off, damaged line or fish that reaches cover. Stop the line entirely if another incident occurs, if the lead system fails to behave as expected, or if changing wind and line angle remove the safety buffer.
Stop fishing the area when the majority of hooked carp cannot be landed cleanly. Korda's fish-care guidance makes the principle clear: anglers should only fish where they have a realistic chance of landing what they hook. Occasional accidents can happen in responsible fishing, but a repeated outcome is evidence that the decision must change.
Common snag-fishing mistakes
The first mistake is measuring distance from the hookbait to the visible leaves while ignoring roots beneath the water. Map the full obstruction and allow for sideways movement. Another is moving progressively closer after each quiet hour, reducing a deliberate buffer without any new information about safety.
Over-tightening every part of the system can be just as dangerous as fishing too loosely. A clutch that cannot release may break line or pull the rod from poor rests; a tail rubber forced onto a clip may stop lead release. Firm control must remain within the tested capability of each component.
Relying on an alarm receiver from far away loses the time the entire setup was designed to save. Near snags, the angler must be at the rods. Reeling in for a conversation, toilet break or fish photograph is part of the tactic.
The final mistake is counting a recovered but badly abraded fish as proof that the spot is safe. Inspect the carp and tackle honestly. If the approach repeatedly creates damage or prolonged entanglement, stop even when some fish reach the net.
Frequently asked questions
Should the reel clutch be locked when snag fishing?
It should be firm enough to prevent an unchecked run before the rod is lifted, but not set beyond the safe capability of the line, knots, rests and rod. Secure the rod and test the setup. Once the fish is in open water, adjust for controlled line release.
Should I fish a slack line near snags?
No, not beside a serious snag. Slack delays indication and allows a carp to travel before movement reaches the alarm. Use direct, controlled contact while ensuring the line doesn't cross an abrasive shelf or other hidden hazard.
How close is too close to a snag?
It is too close whenever a carp can reach the obstruction before you establish control, or when normal casting error removes the buffer. Distance alone cannot answer because line stretch, depth, angle and the snag's shape vary. Start well back and never use lost fish to find the limit.
Should the lead drop off near snags?
Lead release can reduce an anchor point in weed or debris, but it is not mandatory in every swim and must follow venue rules. Use a compatible, recognised system exactly as instructed. The ability to shed a lead doesn't make fishing against branches safe.
What should I do if a carp is stuck?
Maintain calm controlled contact, avoid violent pulling and call the fishery team early. Use only authorised access or boats with appropriate safety equipment and help. Never enter deep water, climb a tree or risk a person to recover a fish.
Final thoughts
Safe snag fishing is defined by the outcome you can reasonably expect, not by how close the hookbait sits to a branch. Map the hazard, leave a genuine buffer, balance the tackle, secure the rods and respond immediately. Plan the angle and landing route before a carp is hooked.
If the line touches a snag, move back and investigate. If you keep losing fish or damaging tackle, stop fishing that spot. It isn't worth repeating. Carp may patrol outside the cover too, so look for somewhere you can place a bait with enough clear water to control and land the fish.