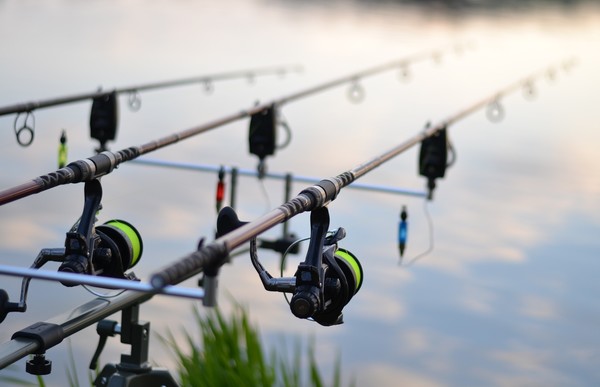
Setting up carp bite alarms is about more than turning up the volume. Start with firm supports, fit the line as the alarm's instructions show and give the bobbin room to move up and down. A few checks now mean clearer indication and less unnecessary beeping.
The alarm, visual indicator, rod angle, main line and reel clutch work as one indication system. Changing only sensitivity cannot remove a deep bow in the line, make a light bobbin stable in a crosswind or reveal a drop-back if the indicator has no travel left. Get the rod angle and line tension right before adjusting the alarm settings.
Affiliate disclosure: this guide contains three Amazon UK affiliate links. CarpAnswers may earn a commission from qualifying purchases at no additional cost to you. Compare current specifications, warranty and seller details, and always follow the instructions supplied with the exact alarm or indicator.
How to set up carp bite alarms and test your bobbins
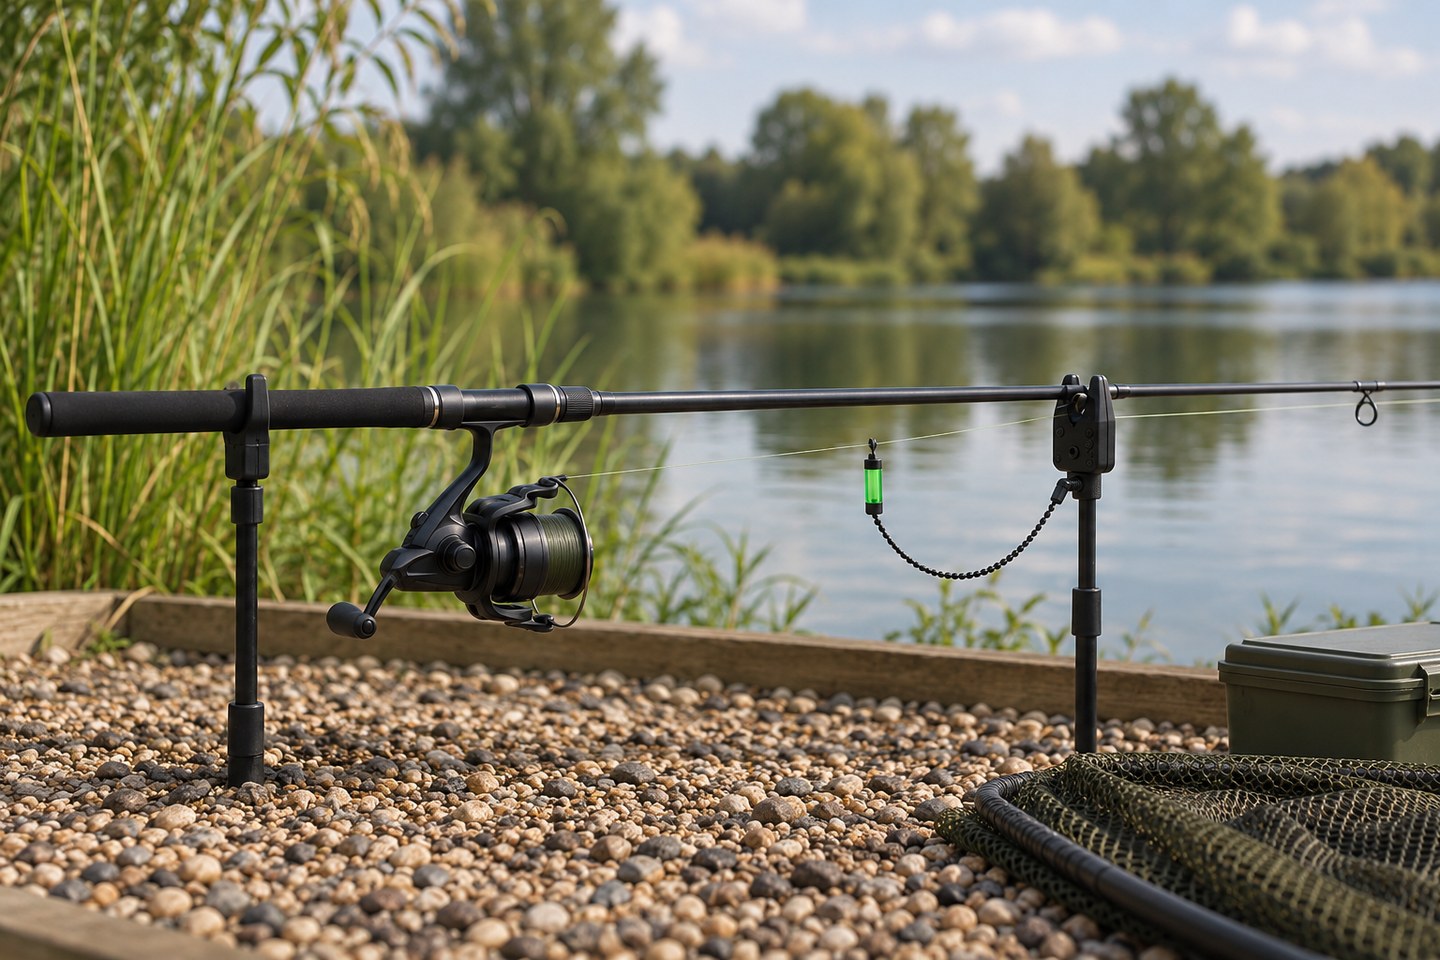
Secure the front and rear rests, mount each alarm upright, seat the rod naturally and position the line on the sensing area. Fit a visual indicator below the alarm, connect it to the line and give it room to rise on a run and fall on a drop-back. Set volume considerately, choose a moderate response setting and simulate both movements before casting.
What each part of the system does
The electronic alarm reports line movement at one point beneath the rod. Roller-wheel alarms respond when line rotates the wheel; vibration or piezo-based designs use a different sensing method. Controls vary by model, so terms such as sensitivity, response, speed and delay are not interchangeable across brands.
A bobbin, hanger or swinger creates visible travel and manages tension on the alarm side of the reel. It can reveal movement towards the angler when it falls, maintain contact in a breeze and help distinguish isolated line movement from a sustained event. It doesn't identify a carp with certainty: liners, weed, birds and water movement can all create signals.
The rod support maintains the chosen line path. The rear grip prevents a forward take from dragging the rod, while the reel clutch or free-spool mechanism controls how line can be taken before the rod is lifted. Our guide to rod pods and banksticks explains how to secure and align those supports.
Mount the alarms on a stable support
Fit each alarm to the front buzz bar or bankstick using its thread and locking collar. Tighten it by hand so the body faces straight forwards and doesn't turn under light line pressure. Don't use the alarm body as a lever or force incompatible threads, because that can damage the base or internal seal.
Place the rear rest so the blank sits naturally through the alarm without being pressed hard against one side. The butt should be retained strongly enough for the situation but remain easy to lift. Check that reel handles, bail arms and neighbouring rods don't collide.
With the rods unloaded, pull line steadily from each fishing direction. If a bankstick rotates, pod slides or buzz bar twists, correct the support before changing alarm settings. Instability can create false signals and, more seriously, allow a rod to move during a take.
Align the rod and line
Broadly aligning the rod with the first section of line reduces sideways loading across the alarm. Perfect alignment is not always possible when several rods fan towards different spots, but the line should remain on the designed sensor during both forward and backward movement.
Check the first butt guide and any alarm ears or line guides. The line must not rub a bankstick, bobbin chain, pod frame or adjacent alarm. A line that catches another object can beep unpredictably, resist a drop-back or release suddenly with a misleading burst of indication.
Rod-tip height shapes the route. Low tips can keep line below surface drift; high tips can clear marginal weed, a near shelf or flowing water. Select the safest route first, then build the indicator tension around it. Don't lower a line across a sharp edge merely to make a bobbin look tidier.
How to set up bobbins with carp bite alarms
A bobbin or hanger suspends a body beneath the alarm on cord or chain. Gravity provides its tension, and many systems accept additional weights. The relatively free movement makes small changes easy to see, while the available drop indicates a fish moving towards the rod.
A swinger connects the indicator body to a hinged rigid arm. The arm controls its travel and can resist wind more consistently than a long loose chain. Spring-tensioned versions may add adjustable force, which can help maintain contact at distance or with elevated tips.
Neither type is universally more sensitive. Effective indication depends on the selected weight or spring tension, line clip, travel and environmental movement. A heavy bobbin can overpower a delicate close-range setup, while an extremely light hanger may dance continuously in strong wind.
The line clip should release or slide in the manner intended by its maker. Some indicators remain attached to the line when the rod is lifted; others release. Test the exact diameter and line material because a clip that is too tight can damage or hold the line, while one that is too loose may fall off before reporting movement.
Choose a visible body and, if night indication is needed, only fit compatible illuminated accessories according to their instructions. Isotopes, LEDs and cable connections must not obstruct the line or prevent the indicator reaching the top or bottom of its travel.
Before you Korda Stow bobbin (paid link), check adjustable weight, chain or cord length, line-clip range and compatibility with your alarm and line. Appearance is secondary to controlled travel.
Set the visual indicator's travel
Place the bobbin roughly between its upper and lower limits so it can move in both directions. If it begins against the alarm, it cannot rise far on a run. If it rests on the ground or base, it cannot fall and show a drop-back.
The ideal starting height depends on the expected movement and line tension. At close range in open water, a central position with a light indicator often provides clear two-way travel. At longer range or with a tighter line, more weight may be necessary to maintain contact, but still leave a room to drop.
Check travel after tightening or slackening the main line because the indicator position will change. Ensure a hanging chain cannot wrap the stick in wind. A rigid arm must sweep without hitting the pod, bank or neighbouring indicator.
Choose line tension before sensitivity
A tight or semi-tight line transfers movement promptly and keeps a bobbin under defined tension. It is useful at range, in crosswinds and where rapid indication is needed. The line path must be free of abrasive features, and very tight lines may be conspicuous or transmit disturbance in some clear, close-range situations.
A slack line can follow contours and reduce a direct line through the swim, but movement must first remove slack before it reaches the alarm. Use it only where the water is open, the route is understood and delayed contact doesn't create a fish-safety risk. Slack-line presentation beside a serious snag is inappropriate.
Semi-slack is not a precise universal setting. It describes enough relaxation for the line to settle while retaining indicator travel and useful contact. Let the line sink, attach the indicator, then test from the rig direction instead of judging tension solely by its appearance at the rod tip.
Line diameter, stretch, depth, distance and underwater obstacles all change transmission. The guide to carp main-line breaking strain and diameter explains why the printed breaking strain alone doesn't predict this behaviour.
Set volume, tone and electronic response
Begin with the manufacturer's default or a middle response setting. Move the line as it will move in the swim, then increase or reduce response one step at a time. Extremely high response can make wind or vibration dominate; an insensitive setting can hide useful short movements.
Volume only changes how the output is heard. It doesn't make the sensor detect less movement. Set it high enough for the angler beside the rods, without disturbing the fishery or nearby homes. A receiver can provide a quieter personal alert where permitted.
Tone helps identify which rod has moved, especially when alarm colours are not visible. Give adjacent rods clearly different tones rather than tiny changes. Record or remember the arrangement so that a signal from a receiver immediately points to the correct line.
Some alarms offer delay, speed, vibration filtering, mute or night-light functions. Follow the manual for that model. Delkim, for example, publishes separate instructions explaining its response and beep-speed controls; those directions should not be transferred to a roller alarm with different sensing hardware.
Test a forward run properly
After casting and setting the line, have a companion pull line carefully near the margin in the direction of the rig, or perform a controlled test from a safe accessible line path. The indicator should rise, the line should remain correctly located and the alarm should produce a sustained response as line continues to move.
Watch the rod support and rear grip during the test. The rod must not slide forwards or twist. Confirm that the reel can give line under its selected clutch or free-spool setting without a sudden uncontrolled release.
A brief hand pull immediately beside the alarm proves little beyond power and sound. Testing from farther along the line includes slack, rod angle and visual-indicator resistance, which are the components most likely to change the result.
How to test a drop-back on a bite alarm
A drop-back occurs when a hooked fish reduces tension by moving towards the angler or dislodging the lead in that direction. Simulate it by first establishing normal tension and then feeding controlled line back towards the rod. The bobbin or swinger should fall visibly while the alarm reports whatever reverse movement that model is designed to detect.
If the indicator hits its lower stop immediately, begin higher or increase usable travel. If it barely falls, check for a trapped line, an overly tight clip, too much slack or friction elsewhere. Don't assume silence means nothing happened; some alarm designs indicate reverse movement differently.
Wind can also make an indicator fall and rise. Look for direction, duration and repetition, then attend the rod whenever a signal cannot be confidently explained. Bite indication supports judgement; it doesn't replace looking at the water and rod tips.
Close-range open-water setup
At short range in clear, snag-free water, a light bobbin with generous two-way travel is a sensible starting point. Use only enough line tension to produce consistent movement at the alarm. Test small pulls as well as sustained movement.
If line is laid slack, reduce environmental line movement first by lowering the tip or repositioning safely. Don't keep increasing electronic sensitivity until every ripple creates an alert. The aim is a quiet baseline from which a real change is easy to recognise.
Long-range and crosswind setup
Distance adds stretch and a bow, while crosswind pushes exposed line. A heavier bobbin or tensioned swinger can take up some bow and maintain contact. Raising response may then help with small transmitted movements, but only after the line route and indicator are stable.
More weight is not automatically better. Excessive indicator load can pull line from the desired position or add resistance. Change one variable, repeat forward and drop-back tests, and stop when the system reports movement without reacting continuously to the conditions.
When comparing Fox Black Label Mini Swinger (paid link), look for controllable tension, unrestricted arm travel and a line clip suited to your diameter. Confirm whether extra weights and illuminated heads are included or model-specific.
Wind, undertow and floating weed
Begin by moving rod tips and exposed line out of the strongest wind where the underwater route remains safe. Remove floating weed from the line and clean the alarm's contact area. A heavier visual indicator may steady the setup, but a continuous procession of weed can make the line unsafe and justify repositioning or reeling in.
Undertow can curve a line below the surface even when the top appears calm. Let the setup settle before final adjustment. If the bobbin steadily creeps, reset it and reassess tension; repeated unexplained movement suggests the line path has not stabilised.
Near snags and weed
Near a snag, use direct contact, secure supports and prompt two-way indication. Stay beside the rods and set the reel system so a carp cannot take an unchecked run before the rod is lifted. An alarm receiver never makes it acceptable to leave a dangerous line unattended.
Test the whole path and leave a buffer large enough to turn a fish. If a carp reaches the obstruction, move the rig farther away or stop fishing the spot. The detailed snag-safety guide covers tackle balance, response and stop rules.
Weed contacting line can imitate short pulls. Don't dismiss repeated signals without checking the rig, because moving weed can also change lead position or mask a take. Reel in when effective indication can no longer be maintained.
Receivers and remote indication
A receiver relays a compatible alarm's signal within the limits stated by the manufacturer. Range figures are measured under particular conditions and should not be treated as permission to leave the swim. Buildings, terrain, batteries and interference can change performance.
Pair and test every alarm channel before casting. Confirm sound, vibration, colour and low-battery warnings. Carry the receiver on the person rather than leaving it in a bag, while keeping alarm volume sufficient for immediate local awareness.
If a receiver is central to the purchase, NGT XT3 bite-alarm receiver set (paid link) by number of alarm heads, weather protection, control layout, battery type, warranty and current manual. Don't compare claimed range alone.
Night setup and considerate use
Complete every movement test in daylight. Keep footwear, headtorch and landing net on a clear route to the rods. Dim night lights to the minimum needed and direct them away from neighbouring anglers and houses.
Use mute functions only as their manual intends, usually for setting indicators or adjusting rods. Confirm that normal output has resumed. If the alarm or receiver status is uncertain, test it again rather than trusting memory in darkness.
Remain close enough to respond immediately. The first carp session guide covers preparation of the landing and fish-care area as part of an attended setup.
Batteries, weather and routine care
Install the specified battery type with correct polarity and inspect the compartment seal. Replace cells when the low-power indication appears, and remove leaking or damaged batteries safely. A spare correct set is more useful than an assortment that doesn't fit.
Weather-resistant doesn't mean submersible. Keep alarms out of standing water, avoid pressure washing and dry the outside before storage. Follow the manufacturer's instructions for cleaning rollers, sensing surfaces and sockets; lubricants can contaminate components and should not be improvised.
Check cables, isotope slots, speaker openings, antennae and threads for damage. Transport heads in a protective case without crushing switches. At the next session, run the two-direction test even if the equipment worked perfectly last time.
Troubleshooting false or missing alerts
For repeated false beeps, inspect wind-blown line, floating weed, a bouncing rod tip, loose support, damaged roller and an indicator striking the pod. Stabilise the physical setup before reducing response. Otherwise the apparent cure may also hide real movement.
For missing alerts, confirm power, volume, sensor contact, indicator travel and receiver pairing. Look for line trapped under a blank, around a chain or against another fitting. Test directly at the alarm, then progressively farther down the line to identify where movement disappears.
If one head behaves differently after fresh batteries and a clean setup, consult its official manual or service provider. Don't open a sealed unit or rely on an intermittent alarm while fishing. A simple front rest and continuous visual control are safer than pretending unreliable electronics are functioning.
Frequently asked questions
Do I need a bobbin with a bite alarm?
For conventional static carp fishing, a visual indicator is strongly useful because it manages tension and shows forward and backward travel. An alarm alone can sound as line moves, but gives less information about direction and may not maintain the intended contact.
How heavy should a carp bobbin be?
Use the lightest weight that keeps the line and indicator stable with useful travel in the conditions. Close, calm open water may need very little; distance, wind or high tips may require more. Test rather than copying a fixed weight.
Are swingers better than bobbins?
Swingers offer controlled arm travel and can resist wind well. Hanging bobbins are simple, highly visible and adaptable with different chains and weights. The better choice is the one that maintains stable two-way indication on the selected line.
What sensitivity should I use on carp bite alarms?
Start near the maker's default or middle response, stabilise the line and move it from the rig direction. Increase only if useful movement is missed; reduce it if environmental movement dominates. The control scale is model-specific.
Should bite alarms be loud?
They need only be audible to the angler attending the rods. Use distinct tones and a tested receiver where appropriate, and keep volume considerate. Loudness doesn't improve detection.
Final setup check
A reliable system has secure supports, retained rod butts, an unobstructed line path, usable indicator travel, appropriate line tension and model-specific electronic settings. It reports a steady pull away and movement back towards the rod without shifting the hardware.
Repeat the test when you cast in a different direction, when wind or weed changes the line and before dark. You want a clear signal when line moves either way, not an alarm that beeps at everything. Once you've checked that, leave the settings alone until the conditions give you a reason to adjust them.