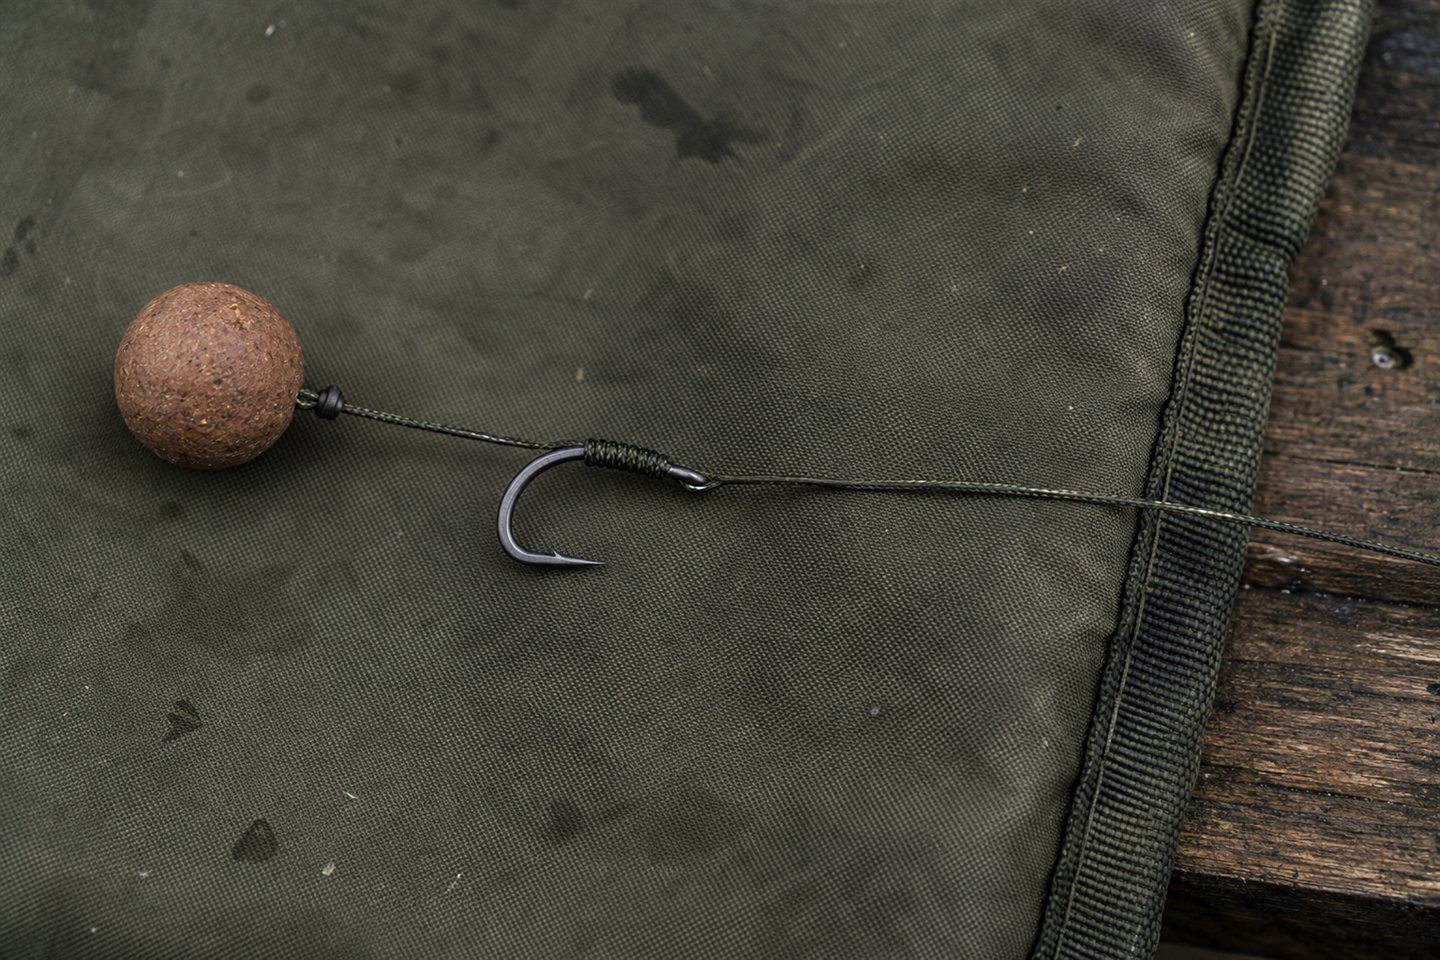
For a closer look at the parts and the Korda component list, see the illustrated blowback-rig tying guide in our beginner overview. Check which version you're tying before changing its materials or connections.
Ready to try a blowback rig? If you can tie a knotless knot, much of this will feel familiar. A small ring lets the hair move along the hook shank. We'll use coated braid and set the ring and hair around the bait you plan to fish with.
For a straightforward bottom-bait, wafter or snowman version, begin with the ring sitting roughly opposite the hook barb when the bait hangs naturally. Treat that as a useful starting point, then let the hook pattern, bait size and buoyancy guide the final position. A quick test in clear margin water will tell you far more than copying a measurement from somebody else's rig board.
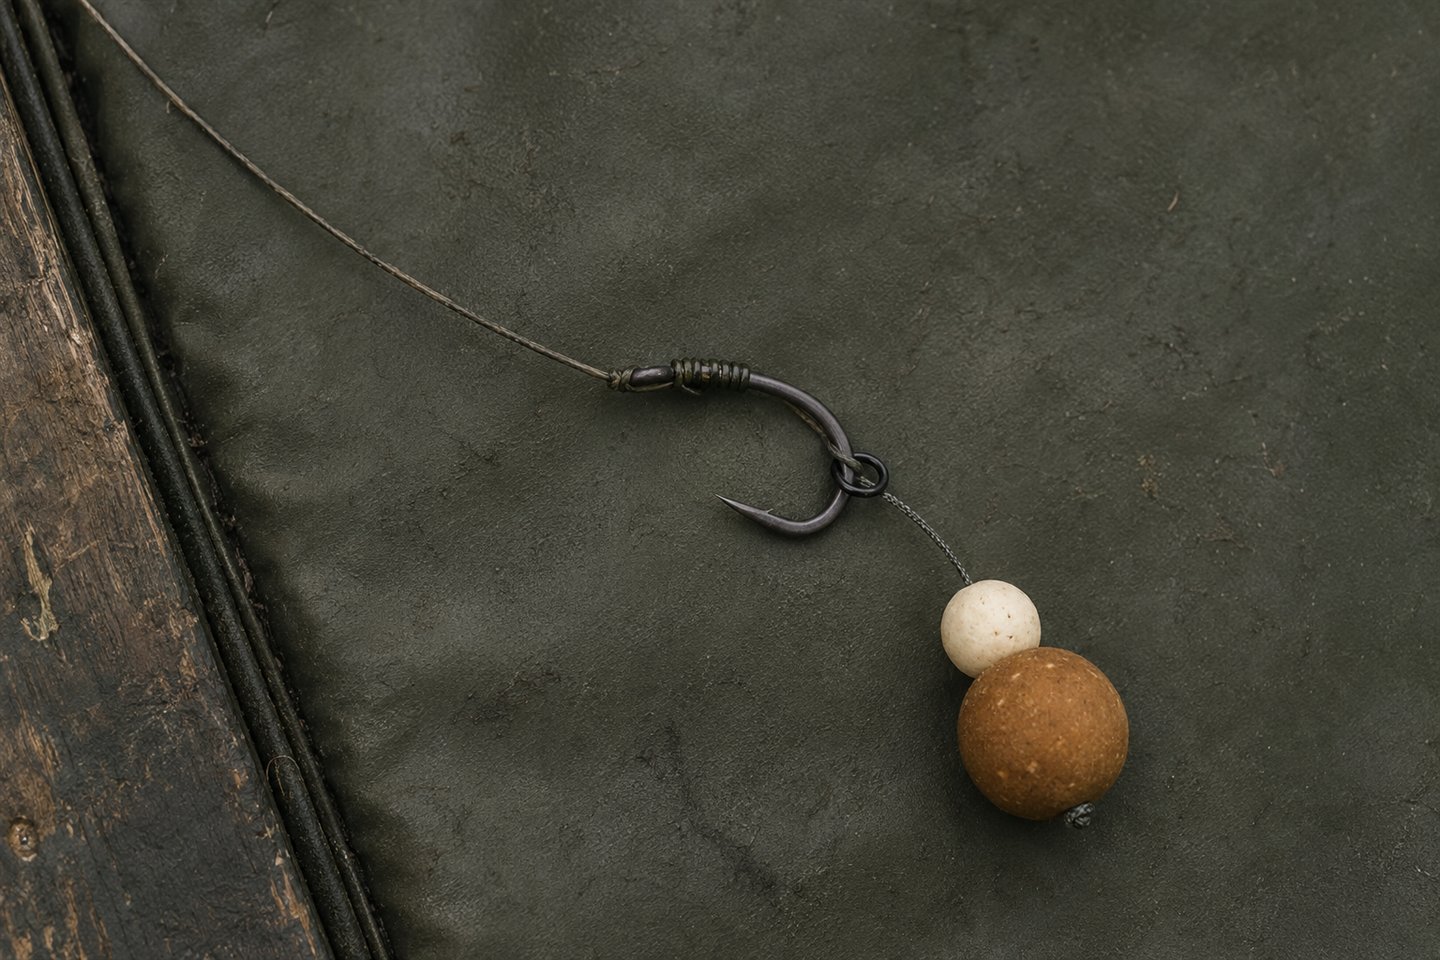
What is a blowback rig?
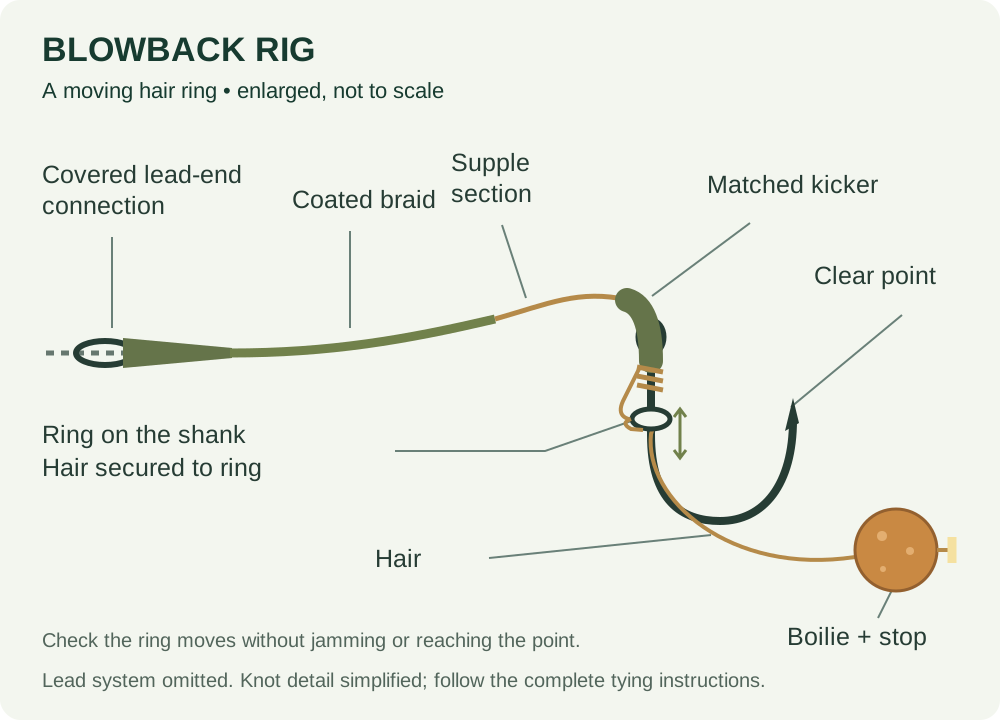
A blowback rig is a development of the standard hair rig. Instead of the hair being held in one fixed line behind the hook, it passes through or is tied to a small ring that runs on the shank. As the bait moves, the ring can travel between its starting position near the bend and the stopping point towards the eye.
Manufacturers and anglers often describe that travel as an anti-eject or reset feature. No rig can dictate how every carp approaches or rejects a hookbait, but the practical advantage is easy to see: the hair has a defined position and a visible range of movement that you can check and reproduce.
The version in this guide uses coated braided hooklink, a bottom bait or balanced bait and a modest kicker. It is a useful general presentation over firm ground, clay, gravel and light silt when tied to suit the bottom. Think of it as a dependable bottom-bait option, not a pop-up rig or a reason to ignore dense weed and deep soft debris.
How a blowback rig differs from a normal hair rig
On a basic knotless-knot hair rig, the hair leaves the whipping at a fixed point on the hook shank. On the blowback rig, a rig ring guides the hair and allows it to move. The knotless knot still attaches the hook, so the core strength of the rig depends on neat turns, a correct exit through the eye and an undamaged hooklink.
Slide the ring along the hook and you'll soon see what needs checking. Its inside diameter needs to travel smoothly on the chosen pattern without being so large that it catches around the eye or kicker. A smooth surface and a compact hair knot keep that travel free rather than letting the ring jam.
Where to use a blowback rig
Picture a reasonably clean area where the coated section can lie without standing over large debris. That is where this version is easiest to use with confidence. A stripped hinge near the hook gives the bait freedom to move, while the remaining coating helps the hooklink kick away from the lead and resist tangles.
Scattered low weed can sometimes be fished with a carefully balanced bait and protected hook point, but the ring, hair and exposed point can still collect strands. Thick weed or serious snags may require another fishery-approved rig and lead system. Never cast to a spot from which a hooked carp cannot be controlled and landed safely.
Choose the components around the real hookbait
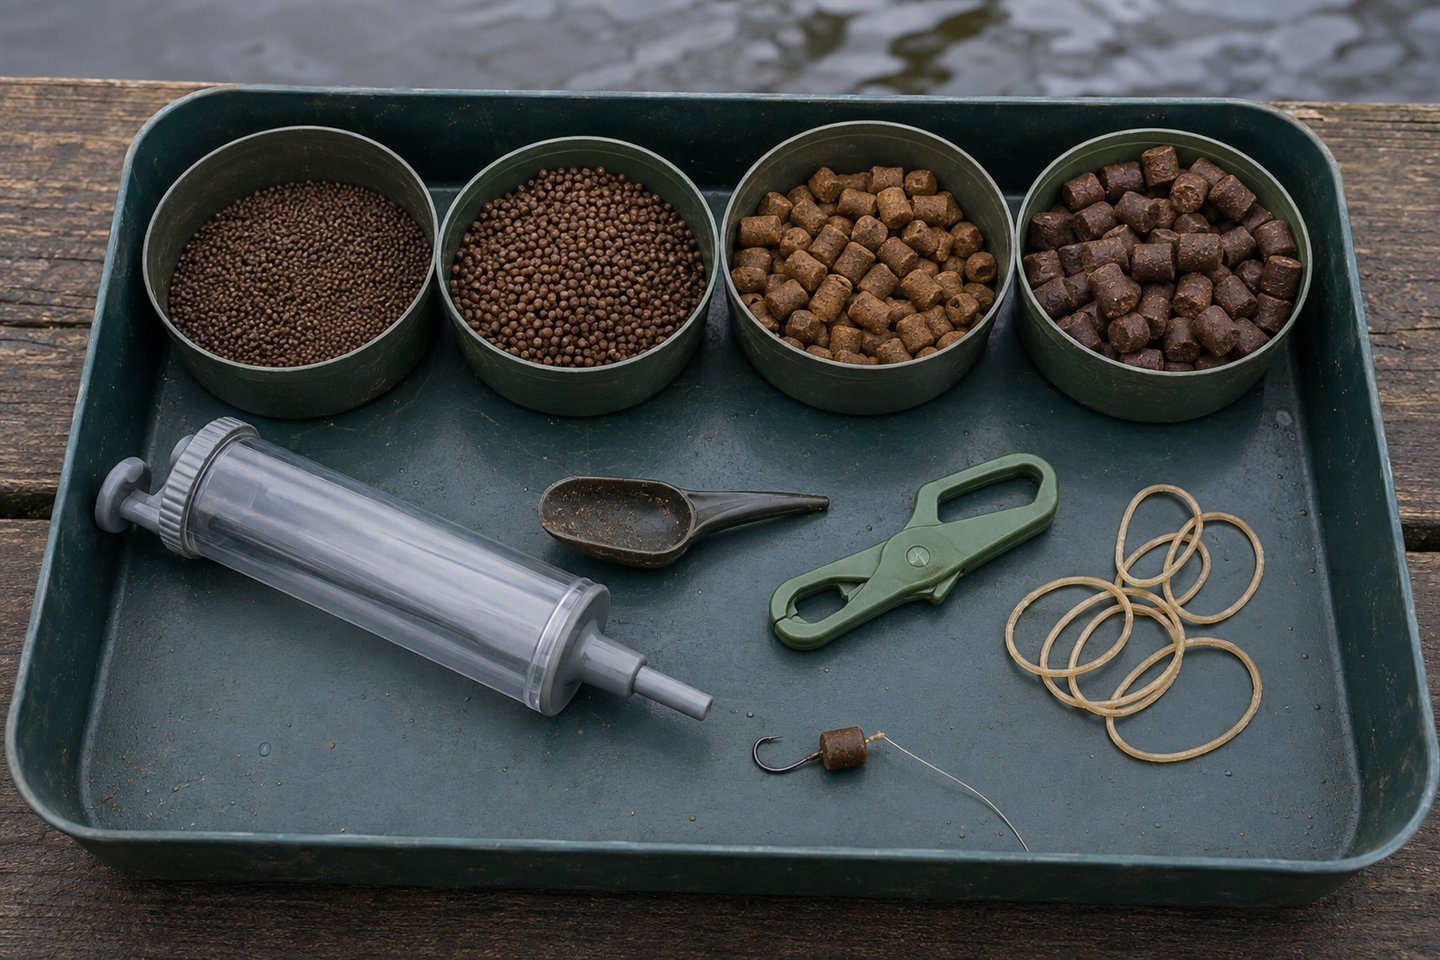
Lay the components out before tying: coated braided hooklink in a breaking strain accepted by the fishery, a permitted hook pattern and a smooth rig ring sized for that hook. Add a baiting needle, bait stop, coating stripper, scissors and purpose-made rig pullers. A correctly sized kicker or a short piece of suitable shrink tube can finish the hook eye when the selected pattern benefits from it.
Have the actual bottom bait, wafter or snowman combination beside you before setting the hair. A guessed diameter often produces the wrong gap after the real bait is mounted. Boilies of the same labelled size can vary slightly, while a snowman needs room for both baits without pushing the hook point into them.
The lead-end connection needs an anti-tangle sleeve and a compatible swivel or quick-change arrangement where appropriate. Use a knot for ordinary coated braid unless its manufacturer explicitly approves that exact material for a matching crimp system. Don't place coated braid in a random crimp because it happens to fit.
Read the venue's rig rules before you start. Hook type, minimum hooklink strength, leaders and lead-release arrangements are commonly controlled. If barbless hooks are required, build and test the rig with the permitted hook rather than swapping it after every other measurement has been set.
How to tie a blowback rig with the right ring position
Step 1: cut and inspect the coated hooklink
Begin with roughly 30 centimetres of coated braid so there is enough material to work comfortably and choose the final length later. Run it between your fingers under good light. Reject any section with cracked coating, flattened fibres, abrasion or a sharp permanent kink. A flaw hidden beneath the whipping remains a flaw.
Step 2: strip the hook end safely
Remove around 10 to 15 centimetres of coating with a purpose-made stripping tool, working away from your fingers. This supple section forms the hair, ring connection, knotless-knot turns and small hinge behind the hook. Avoid scraping repeatedly at one point, as that can damage the braid rather than removing its coating.
Step 3: tie a compact hair loop
Form a small overhand loop at the end of the supple section and tighten it neatly. The loop only needs to hold the selected bait stop securely. An oversized loop can leave the stop sitting away from the bait or catch during casting, while a tiny poorly tightened loop can pull through under pressure.
Step 4: mount the bait before measuring the hair
Pass a suitable baiting needle through the boilie, catch the hair loop and draw it back through. Fit the stop and seat the bait gently without crushing it. For a snowman, mount both parts in the same order and orientation you intend to fish, then check that they sit firmly together.
Step 5: set a practical gap behind the hook
Lay the mounted bait beside the hook and decide where the rig ring needs to sit. You're looking for enough separation to keep the point and gape clear when the bait swings, without leaving such a long hair that it can wrap around the hook. Let the real bait and hook pattern decide the gap.
Step 6: tie the hair to the rig ring
Pass the supple braid through the smooth ring and secure it with a small, neat overhand knot at the selected position. Tighten it progressively, then look at the braid on both sides. This little connection is easy to overlook, so retie it if the braid flattens, frays or shows damaged fibres.
Step 7: slide the ring onto the hook shank
Pass the hook point carefully through the rig ring and move the ring around the bend onto the shank. For this version, start with the ring roughly opposite the barb while the bait hangs naturally. Protect your fingers from the point and don't force an undersized ring around a large barb or awkward bend.
Step 8: align the hair along the back of the shank
Pass the long end of the hooklink through the hook eye and draw the hair into a straight line along the back of the shank. Hold it there while you set the ring position and bait gap. Keep the hair away from the point and make sure it is neither twisted around the shank nor trapped where the whipping will sit.
Step 9: form the knotless knot
Whip seven to nine neat adjacent turns from the eye towards the bend, or enough turns to suit the usable shank of the chosen hook. Each turn should sit beside the previous one without overlapping. Keep the hair aligned beneath the turns and stop before the whipping crowds the rig ring.
Step 10: finish through the hook eye correctly
Pass the working end back through the hook eye so the hooklink exits on the hook-point side. Moisten the knot and tighten it smoothly while keeping the turns aligned. This exit helps create the intended angle at the eye, but it cannot rescue loose, crossed or damaged whipping.
Step 11: add a modest kicker or line aligner
Fit the correctly sized preformed kicker over the eye, or shrink about one centimetre of suitable tubing according to its instructions. Aim for an extension that continues the intended angle without closing the hook gape. Keep fingers and hooklink clear of steam and use a proper steaming method; a naked flame has no place near the rig.
Step 12: finish the lead-end connection
Choose the finished hooklink length for the lakebed, slide on the anti-tangle sleeve if required and tie a figure-of-eight loop or another manufacturer-approved connection for the compatible swivel. Moisten the knot, tighten it steadily and run your fingers over the coating beside it; splitting or bunching means tying that end again.
Step 13: pull-test the complete hooklink
Place proper rig pullers at both ends and apply firm pressure progressively. Keep the braid on the pullers rather than wrapping it around bare fingers, and watch the hook knot, ring connection and lead-end loop as the pressure builds. If a knot moves, fibres separate, coating tears or the hook eye damages the braid, tie a fresh rig.
Set the rig-ring position correctly
Use the point opposite the barb as a repeatable baseline, not a rule carved in stone. It gives the ring room to travel while keeping the bait away from the hook eye, but long-shank, wide-gape and curved patterns all create different distances between the eye, barb and bend.
Hold the rig by the coated section and move the bait slowly. A suitable ring will travel without catching on the knotless-knot turns, hook eye or kicker, while still stopping before the eye. If it wedges beneath an opening, grinds against a join or feels rough beneath your fingers, use another ring.
Now look at the bait when the ring rests near the bend. You want a completely clear point and full gape. If the bait touches either, shorten or reposition the hair connection, reduce the bait size or reconsider the hook pattern. Moving the ring alone can create another problem if the underlying bait gap is wrong.
How long should the hair be on a blowback rig?
A short hair keeps the bait close to the hook but can crowd the bend and restrict the ring. A very long hair creates separation, yet it may wrap around the shank in flight or let the bait behave unpredictably. This is one of those details best judged with the actual hook and boilie in your hand, because no single gap suits every combination.
Set the hair with the hookbait already mounted, then view it from several angles. Swing the bait past the point and compress it gently towards the bend as it might move on the lakebed. If the point disappears behind the bait or the ring jams, adjust before tying another rig to the same measurements.
Balance a bottom bait, wafter or snowman
A standard bottom bait ought to rest naturally without lifting the hook or twisting the hair beneath it. Watch how its weight affects the ring rather than letting it pull hard against the bend in an awkward position. An unusually heavy or soft bait is also worth immersing for a while, so you know it remains secure.
A wafter should reduce the effective weight of the hookbait while allowing the hook and hooklink to settle consistently. If it lifts the hook eye or stands the hook section upright, the bait is too buoyant for that combination. Add only a small amount of non-toxic putty at a suitable point on the hooklink, keeping it away from the ring and supple hinge.
A snowman combines a sinking bait with a buoyant topper. Mount both before setting the hair and test whether they rotate or separate on the stop. Different pop-up pieces can change the balance significantly. Trim only if the bait remains structurally secure and the venue allows the preparation.
How to tie a blowback rig with coated braid
The appeal of coated braid is the balance it gives you. The stripped section near the hook leaves the ring, hair and bait free to move, while the coated remainder resists tangles and helps push the hookbait away from the lead. It is easy to tie, easy to inspect and well suited to a general-purpose bottom-bait presentation.
Coating stiffness is not always an advantage. On uneven ground it can bridge over small hollows, and in soft silt a short stiff hooklink may follow the lead into the bottom at an unnatural angle. Strip only the planned hinge section and choose the remaining material for the spot rather than for its appearance on a rig board.
Adapt the blowback rig to the lakebed
Firm gravel or clay
A moderate coated hooklink can lie neatly and create useful separation on a firm area. Feel the lead down and map around the target because a single hard impact doesn't prove the entire patch is clear. After a cast onto gravel, a quick touch of the hook point will reveal whether contact with a stone has turned it over.
Light silt
Consider a slightly longer hooklink and a lead that will not plug in deeply. The coated section needs enough flexibility to follow the surface rather than stand above it. Where possible, lower a spare rig into similar margin silt and observe how the bait, ring and hinge settle.
Leaves and scattered debris
A balanced bait can help the hook section settle gently, while a small piece of dissolving PVA foam may protect the point during the cast where the rules allow it. Neither method makes the presentation immune to debris. If the lead lands differently, or the area changes through the season, wind in and see what the rig has picked up.
Low weed
Small strands can catch around the ring and hair even when the hook point has been protected. A longer, softer or differently balanced rig may present better, provided the lead system and line angle still give a hooked carp a clear route out. Test a comparable edge and leave the rig where it lands rather than dragging it across the spot.
Heavy weed or snags
The rule here is simple: if you could not control and land a hooked carp from the swim, don't put the rig there. Use a fishery-approved presentation and lead system suited to the conditions, stay close to the rods and leave the fish a clear route away from weed or snags. If the swim cannot offer that, choose another spot.
Cast and check the blowback rig
Give the rig one final look before the first cast. You want a secure bait stop, a freely moving ring, a kicker that covers the eye and knots that have passed a firm pull test. Feather the cast before the lead lands so the hooklink straightens behind it, then feel the lead down without stopping it so hard that the rig swings back towards you.
If the lead doesn't land on the expected bottom, wind in and look the rig over. Dragging it across the lakebed can catch the exposed point, move the ring or damage the coating. After every retrieve, feel the hook point and look at the hair position and stripped hinge before attaching another bait.
Connect it to a fish-safe lead system
A strong blowback hooklink doesn't make the complete tackle safe by itself. Choose a running lead, lead clip, helicopter arrangement or another system that suits the bottom and complies with venue rules. Assemble it from parts designed to work together so that a main-line break doesn't leave the carp towing a fixed lead.
Don't push a tail rubber as tightly as possible simply because losing a lead is inconvenient. Don't combine a swivel, insert and clip solely because their nominal sizes sound alike. Follow the current manufacturer instructions for the full system and test its intended action with the actual leader or main line.
Common blowback-rig mistakes
Choosing a rough or oversized rig ring
A rough join can damage the hair or catch on the hook, while an oversized ring may travel beyond the intended area. Move the ring over the hook before tying and again after tightening the hair knot. If it feels questionable, replace it; this is not a component worth rescuing.
Guessing the hair length without the bait
Setting the hair around an imagined 15mm boilie often produces the wrong gap with the bait actually selected on the bank. Mount the exact bottom bait, wafter or snowman first. The extra minute makes point and gape clearance much easier to judge.
Overlapping the knotless-knot turns
Crossed whipping can tighten unevenly, pinch the braid and change the exit at the hook eye. Keep each turn beside the previous one and maintain light tension throughout. If the turns ride over one another, unwind them or retie rather than pressing them flat with a fingernail.
Using too much shrink tube or an aggressive kicker
A long extension may close the usable gape or make the hook section sit at an unintended angle. Use a modest correctly sized kicker and view the baited rig in water. More curve doesn't automatically mean faster turning or a better hook hold.
Failing to inspect after a cast or carp
The ring can collect debris, the hair can wrap and the hook point can turn over without the rest of the rig looking damaged. Look over every part after retrieval and replace the hooklink if the coating, braid or knots have changed. Reliable rigs are maintained, not merely tied once.
When to choose another carp rig
A stiff boom and spinner arrangement may be more suitable when you want a replaceable hook and low pop-up over firm ground. Very soft silt, chod or dense weed can call for other hooklink and lead-system combinations. Our guide to carp rigs for different situations compares the main options without suggesting that one rig covers every lakebed.
Frequently asked questions about the blowback rig
Where should the ring sit on a blowback rig?
Opposite the barb is a sensible starting point for this bottom-bait version, but hook pattern and bait size can change the best position. You're looking for free ring movement with the bait clear of the point and gape. Set it with the real bait mounted and watch the movement in water.
Can I use a pop-up on a blowback rig?
Pop-up blowback variants exist, but ring position, counterweight, hook balance and sometimes the hook pattern differ. Don't simply replace a bottom bait with a buoyant pop-up. Follow a tested version for that presentation and lower the completed rig into water before casting.
Final thoughts on tying a blowback rig
The blowback rig becomes easy to repeat once you concentrate on a few important details. Mount the real bait before setting the hair, use a smooth ring that fits the hook, begin around the barb position and make a neat knotless knot that exits towards the point side of the eye.
Fit the correctly sized kicker, pull-test both ends and lower the baited rig into water to see how it settles. Match the braid and hooklink length to your spot, with a compatible fish-safe lead system. Get this version working neatly before trying lots of variations—you'll find it easier to see what each change does.
Further reading and source checks
For component sequences and variations, see Korda's guide on how to tie a blowback rig, the Gardner Tackle features on a hook-aligner blowback rig and the presentation's construction, and the current Nash ring blowback configuration.
The Angling Times rig-refinement guide provides further practical context. For the complete tackle rather than the hooklink alone, use Korda's explanation of choosing a fish-safe lead system.