A small PVA mesh bag puts a helping of feed beside your carp hookbait without much fuss. We'll make one first, then look at sticks and stringers. Before fishing, check that the PVA melts properly and leaves the hook clear.
Start with the compact mesh bag if this is new to you. Once you can make that consistently, the stick and stringer are useful alternatives for different baits and rig arrangements. The aim is a controlled parcel with a clear purpose—not simply adding more feed and drag to every cast.
How to use PVA mesh for carp fishing: three methods
| Method | Useful starting contents | Main check |
|---|---|---|
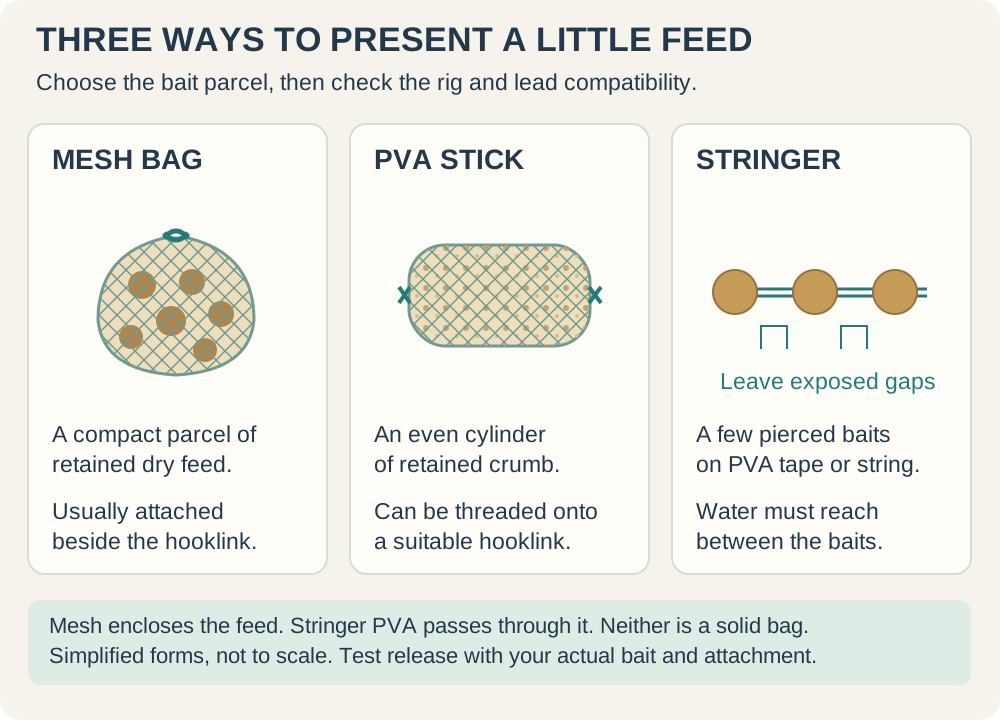
| Compact mesh bag | A few dry pellets or boilie pieces retained by the weave | Hook attachment must release without moving rig components |
| Compressed mesh stick | Dry crumb and small particles held in suitably fine mesh | Threading must not damage the hooklink or move counterweight |
| PVA stringer | A few pierceable boilies with exposed tape between them | Keep gaps so water reaches the PVA inside the bait chain |
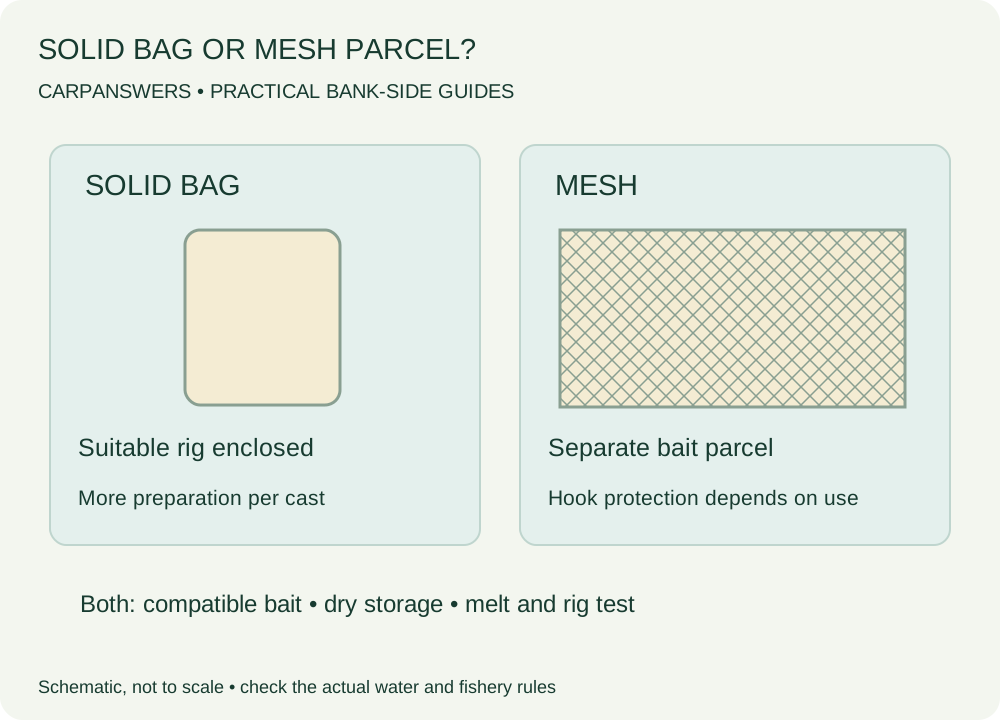
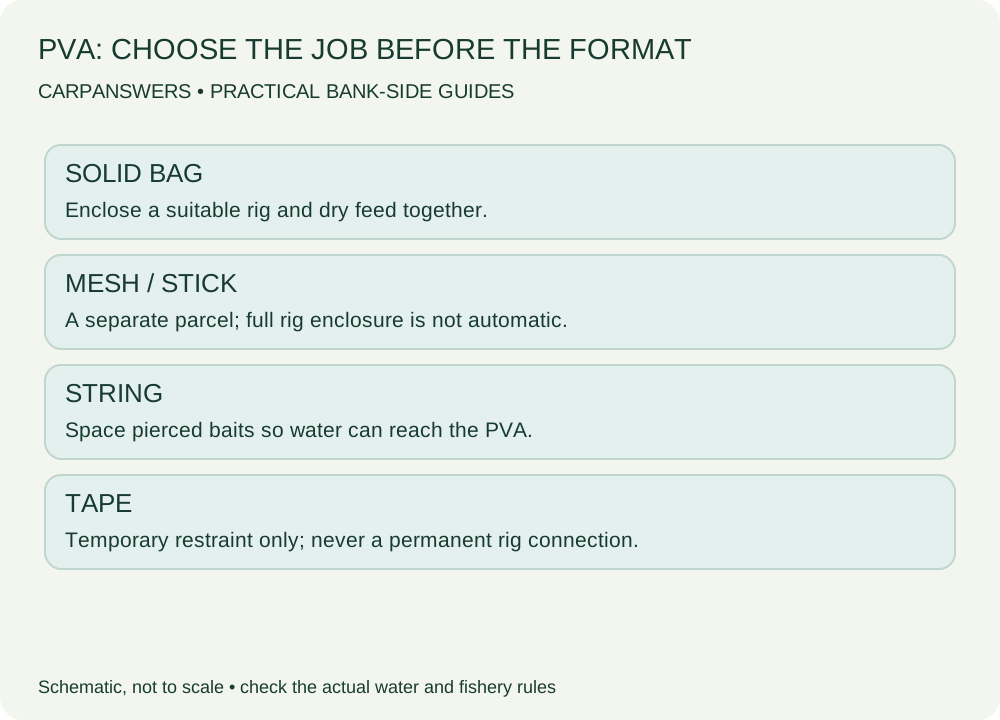
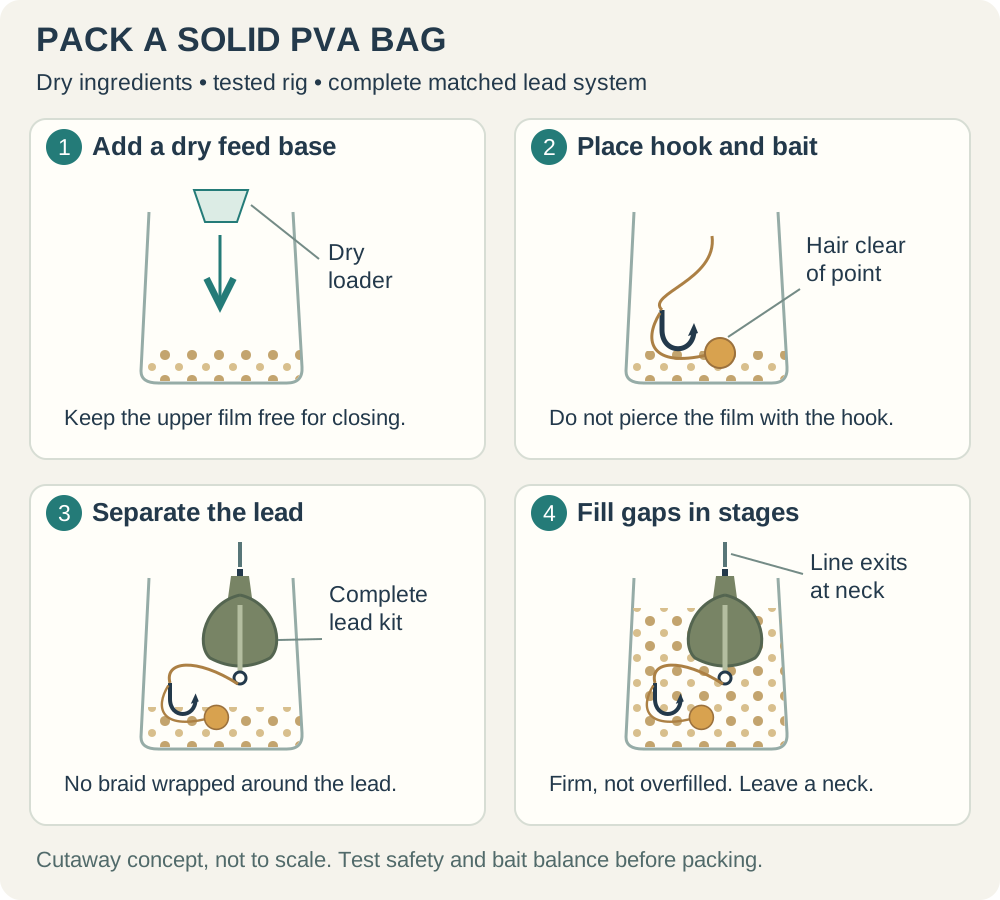
None of these is a solid bag. A solid PVA bag normally encloses the lead, hooklink, hookbait and feed in film. Mesh and stringers usually add a separate parcel to an already assembled rig. Their casting forces and lead-system compatibility need checking independently.
Use mesh for an amount of feed you can justify. A small parcel after a bite may be useful; a large one on every exploratory cast may feed several unintended areas. Count every parcel in your baiting plan, including failed casts, and take unused mix home at the end.
PVA mesh components and tools
For a compact mesh bag
- Korda Original Funnel Web system (paid link), with loading tube, supplied mesh and plunger. Check that the actual weave retains your chosen feed.
- Dry boilies (paid link) or suitably sized pellets (paid link). Fine crumb requires the matching fine-mesh refill below, not the supplied coarse Hexmesh by default.
- Korda RazorBlades scissors (paid link), a dry bait container and a dry towel.
- A complete, tested rig and compatible lead arrangement. A straightforward hair rig can use Korda Super Natural braid (paid link), a suitable Wide Gape hook (paid link), bait stops (paid link), a tested hookbait (paid link) and a baiting needle (paid link).
Required additions for the fine-crumb stick
- Korda Original Funnel Web Micromesh refill (paid link). The linked product is a 20 m refill only: load it onto the matching Original Funnel Web tube and use that system's plunger. It doesn't include a tube or plunger and is not the Longchuck refill size.
- A suitable long gated Korda Heavy Latch Stik Needle (paid link) for drawing the hooklink through the stick. This tool can also thread the boilies for a stringer.
Stringer and optional alternatives
Korda Kwik-Melt PVA tape (paid link) is required for the stringer below. The narrower Korda Longchuck Funnel Web system (paid link) is an optional alternative for suitably sized retained feed, not something you must buy alongside the Original. Don't combine it with the Original-size Micromesh refill. A container of water is required for checking every method's release.
For a permitted lead-clip example, the Korda Lead Clip Action Pack (paid link), an appropriate swivel lead (paid link) and suitable main line (paid link) provide the starting components. Confirm the supplied swivel and any replacement are correct for that clip; a threaded-stick version also needs a compatible quick-change swivel (paid link) and anti-tangle sleeve (paid link).
Use the lead-clip setup guide and the maker's instructions before attaching any parcel. If mesh causes that system to eject its lead on impact, don't defeat the release mechanism to keep fishing it. Reduce the parcel or choose a properly approved alternative.
Check the exact variant before buying. Ordinary scissors, a suitable container and existing safe tackle need not be replaced just to match a shopping list.
Match the tube and weave to the bait
The tube controls the approximate parcel diameter; the weave controls what falls out. Those are separate decisions. A narrow tube can make a long stick, while a wide tube can make a very short bag. Neither diameter alone tells you whether fine crumb will stay inside.
Korda's Original Funnel Web specification describes its included Hexmesh, protective tube and plunger, with Micromesh refills available. Its Longchuck system is a narrower option for compact parcels. Check the refill matches the system you own before ordering.
Test a spoonful of dry feed in a spare section of mesh over a tray. If important ingredients fall through, use a suitable finer weave or change the mix. Stretching coarse mesh tightly around powder will not turn it into micromesh. Equally, large bait pieces should fit down the tube without forcing and splitting the weave.
Choose melt behaviour for the real water temperature and likely descent, using the product instructions as a starting point. A cold shallow margin and a warm deep swim are different problems. Don't use a universal number of seconds or assume that a winter test proves how the same parcel will behave in summer.
Prepare dry bait and a dry working area
Keep the PVA container shut while handling wet tackle. A spare dry towel is more useful than repeatedly wiping wet hands on already damp clothing. Take only enough mesh out for the next parcel and move the open tube away from rain, condensation and splashes.
For a first mesh bag, choose dry bait pieces that the supplied weave retains. For a stick, use consistent crumb and small particles in fine mesh. Remove hard lumps that could deflect the needle or press into the hook point. A uniform mix compresses more predictably than one large chunk surrounded by dust.
Water-based liquid, wet pellets and surface moisture can attack PVA before the cast. A liquid described by its manufacturer as PVA friendly still deserves a test with the exact mix. “Oil-based” is not sufficient proof for every blended product, and soaking a parcel heavily can alter underwater breakdown.
Begin without liquid so you have a baseline. Later, compare a dry parcel with one containing the intended additive in the same water. If the treated one stays bound or releases poorly, it has not passed simply because it survived in your hand.
How to make a compact PVA mesh bag
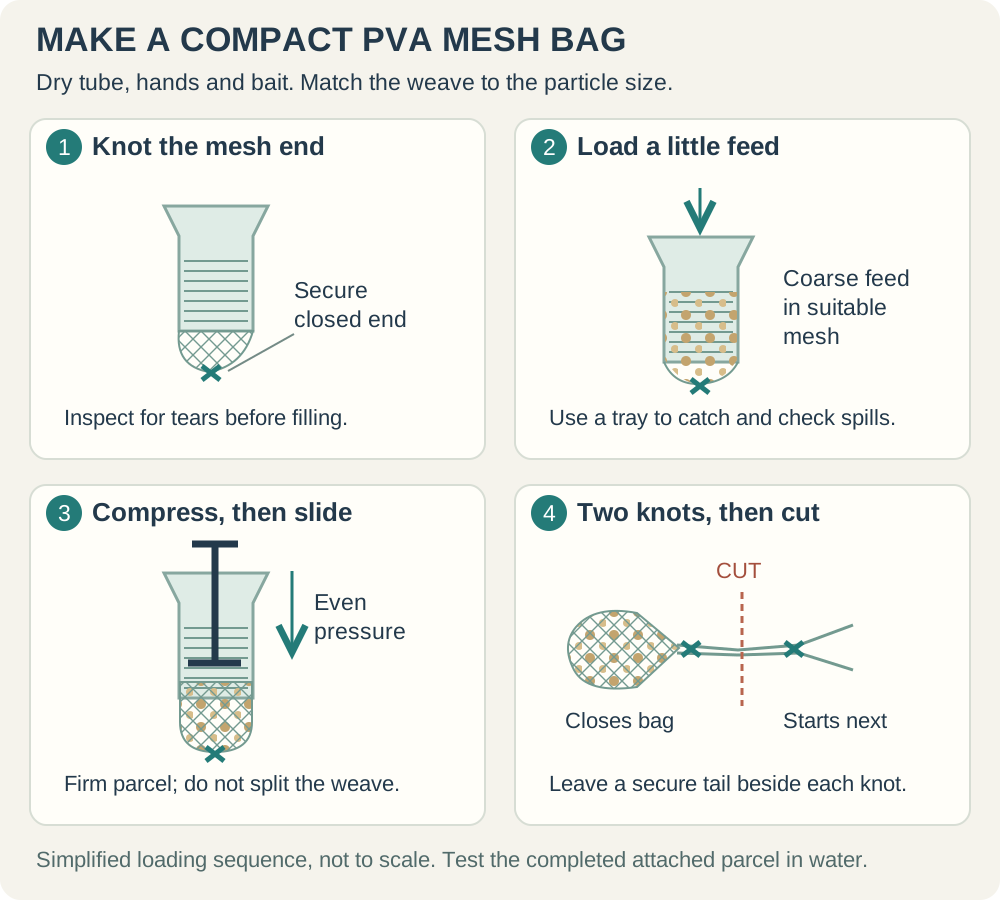
- Close the end. Pull a short length from the dry tube and tie a secure overhand knot in the mesh itself. Inspect for ladders, tears or an open end.
- Load the bait. Hold the tube over a tray and add a modest amount through its funnel. Start smaller than the largest bag you think you might eventually need.
- Compress and slide. Use the supplied plunger to settle the bait evenly towards the knotted end, then ease the filled section off the tube. Keep enough tension for a firm parcel without stretching holes into the weave.
- Close and cut. Tie the mesh above the bait, then tie a second knot farther towards the tube. Cut between those knots, leaving each enough tail to remain secure. One seals your bag; the other starts the next.
The most revealing check is a gentle squeeze over the tray. The parcel should retain its contents without leaking or developing a ladder. If it needs a fistful of extra mesh wound around it to stay together, rebuild it. Bulky wrapping adds another uncertain release point.
Keep the closing neck free of trapped bait. A pellet in a knot can prevent it seating neatly and produce a weak or bulky closure. Don't trim flush against the knot merely to save a tiny length of mesh; leave a sound finished end and include it in the water test.
Make two or three practice parcels using the same scoop. Compare their size, weight and firmness. Consistency helps you diagnose casting or release problems later, because you're not unknowingly testing a different bag on every cast.
How to attach a PVA mesh bag to a carp rig
For the straightforward hair-rig example, attach the hook through a small area of sound mesh near the closed end using the maker's demonstrated method. The mesh must hold during the cast yet leave the hook completely free once dissolved. Don't spear a hard pellet, bury the point in a boilie or bind multiple turns around the hook.
Inspect the hair before and after attachment. It should not wrap around the shank or pull the hookbait tight against the point. Keep the bag's weight away from a movable bait swivel, hook bead or silicone hair-positioning component whose movement would change the rig.
A hook-mounted bag is not appropriate for every rig. The beginner rigs overview shows which small parts govern each presentation. Where those parts can slide under the parcel's load, don't assume a smaller bag fixes the problem; choose a demonstrated compatible method.
Korda's mesh guidance specifically discusses parcel drag, lead ejection and movement of rig components. Learn the complete attachment, not just the final photograph. Extra weight and a new pulling direction can change tackle that worked correctly before the bag was added.
How to make a PVA stick for carp fishing
A stick uses the same basic tube-and-plunger process but forms a longer, evenly compressed cylinder. For this fine-crumb version, load the Original Funnel Web tube with its matching Micromesh refill and retain the matching plunger. Start with a suitable supple hooklink with a lead-end loop and an approved quick-change connection. It is not a method for dragging a stiff boom, putty or large swivel through a narrow lump of bait.
- Build the cylinder. Use fine dry mix retained by the chosen mesh. Add and compress it in small stages, then close and cut as for the mesh bag.
- Make a clear needle route. With the hooklink disconnected from its quick-change connection, pass a suitable long gated needle lengthways through the centre of the stick. Keep your other hand away from the emerging point.
- Catch the lead-end loop. Engage only the hooklink loop in the needle latch and close the gate. Draw it smoothly through the cylinder without snagging fibres or forcing the knot.
- Position and reconnect. Slide the stick along the supple section towards the hook so the point sits lightly in the end crumb, not in a hard pellet. Reconnect the lead-end loop and fully cover the approved quick-change connection with its sleeve.
- Inspect the whole rig. Look for damaged braid, a trapped hair, moved counterweight and a point pressed into hard bait. Release-test this exact arrangement before fishing.
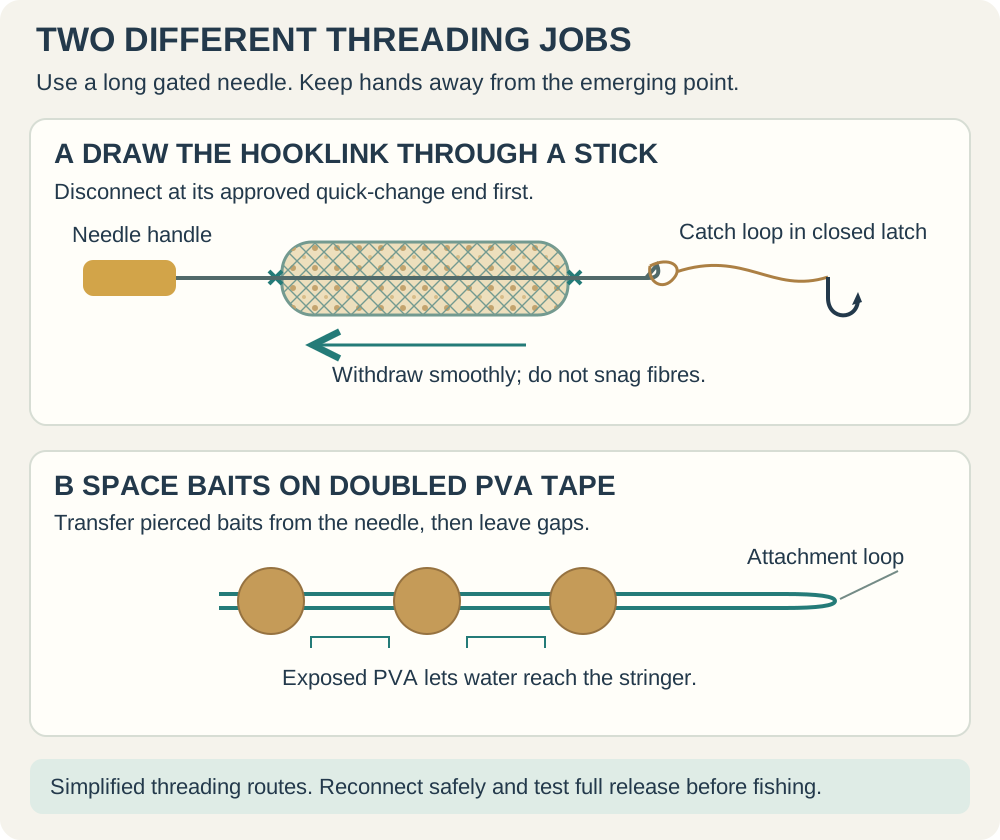
A needle that is barely long enough encourages excessive squeezing and awkward hand positions. Korda's Essentials needle guidance distinguishes its long gated Stik Needle from shorter baiting tools. Use an appropriate tool rather than forcing a fine hookbait needle through a long, tightly packed cylinder.
Stop if the needle catches fibres or the loop needs force to pass. Split the practice stick open, inspect the material and rebuild with a better-suited parcel. Saving one small amount of PVA is not worth fishing a damaged hooklink. Recheck the quick-change sleeve every time you reconnect it.
How to make a short PVA stringer
A stringer carries a few robust pierced baits on dissolving string or tape. It doesn't require a mesh tube or plunger. This is useful when you want several whole boilies near the hookbait without enclosing them in a larger parcel. Start with just a few to keep handling and casting manageable.
- Select and pierce the baits. Use dry boilies that can be pierced safely with the appropriate long needle. Support each bait without placing fingers in front of the point.
- Transfer onto doubled PVA. Catch the folded end of the tape in the closed latch and draw the baits onto the doubled length, leaving a loop available for the approved hook attachment.
- Separate the baits. Leave visible gaps between neighbouring boilies so water can contact the PVA. Don't compress them into one continuous bait sausage.
- Attach and check. Use the product maker's loop-over-hook arrangement, with the top bait retaining it as demonstrated, without masking the point or trapping the hair. Trim excessive loose ends and release-test it.
Korda's PVA String instructions explain the doubled loop method and the importance of gaps. Follow the equivalent instructions for your chosen tape; the illustrated principle is exposed dissolving material between baits, not an exact mandatory gap measurement.
Check that the top bait cannot slide into a position that blocks the point. If the intended attachment doesn't suit the hook pattern or rig, don't make an improvised permanent loop of fishing line instead. A little mesh parcel may be the easier solution, provided that method is compatible too.
Watch the practice stringer until the baits actually separate. A soft outside strand doesn't establish that the section buried in each boilie has released. Hard air-dried baits, very tight spacing or extra knotting can change the result. Keep the chain short and make only the amount you intend to use.
Lead-system compatibility comes before casting
Don't use this mesh tutorial with the Korda Inline Safety Kit specified in our solid-bag rig. Korda's product instructions warn that Funnel Web bags can cause that particular system to eject the lead on impact. Solid-bag compatibility is not mesh compatibility.
Likewise, an external parcel can affect a lead clip's release behaviour. Follow the exact system's instructions and test a modest setup. Never glue a swivel, pin a moving part, jam a tail rubber or block a bead to cure premature release. The solution must preserve the intended fish-safety mechanism.
For a different inline arrangement, work through the inline lead guide and check the specific maker's mesh instructions; don't transfer an approval from another product that looks similar. If compatibility is unclear, choose a simpler documented system or ask the manufacturer before fishing it.
Release testing and the first cast
Lower a completed example into a clear container of representative-temperature water. Include its knots, bait, liquid and actual hook attachment. Watch until the contents disperse, then inspect the point, hair and moving rig parts. Gently move the released hooklink to check nothing remains bound around it.
Record the release behaviour rather than only the first visible change. Repeat after changing weave, mix, knot size, temperature or liquid. A container cannot reproduce an impact at range or a deep descent, but it can expose a parcel that fails to release at all.
Consider the complete loaded weight and the extra drag. A bag hanging from the hook can swing separately from the lead. Use suitable tackle, a clear casting area and a controlled progressive cast. Reduce parcel size or range if it cartwheels, splits or repeatedly lands inaccurately; don't solve poor flight with more force.
Retrieve after any doubtful cast or unexpected lead ejection. Check the whole rig, not just whether some bait remains. PVA is temporary packaging: once it has done its job, the setup still needs a clear hook, sound connections and an appropriate lakebed beneath it.
Common PVA mesh problems
| Problem | Practical response |
|---|---|
| Crumb escapes before casting | Use a finer compatible weave or larger bait particles; don't stretch coarse mesh tighter. |
| Mesh tears while filling | Check sharp fragments, dampness, over-compression and a damaged tube edge; replace weakened mesh. |
| Needle catches the hooklink | Stop, inspect fibres and gate, and rebuild with a suitable needle and less obstructed stick. |
| Hair or hook bead moves | The attachment is changing the rig. Use a demonstrated compatible method rather than accepting the movement. |
| Stringer stays as a chain | Check exposed gaps, PVA type, extra knots and bait moisture; repeat the full release test. |
| Bag survives dry but releases poorly | Check liquid coating, temperature, PVA bulk and compressed mix. Dry compatibility is only half the test. |
Frequently asked questions
Should beginners start with mesh or solid bags?
A small mesh parcel is quick to learn, provided the rig and lead system are compatible. Solid bags require more packing practice but keep the complete terminal setup in one parcel. Choose the method for your existing safe setup and feeding aim.
Can wet sweetcorn go in a PVA mesh bag?
No: surface water can weaken it immediately. Keep the beginner bait mix dry. Specialist preparation methods require their own reliable compatibility and release tests; coating something casually is not proof that moisture is harmless.
Does a PVA stick stop all tangles?
No. It can help control a suitable hooklink during the cast, but poor threading, trapped hair, a split parcel or an unsuitable landing spot can still spoil presentation. Retrieve and inspect whenever the cast gives you reason to doubt it.
Can I prepare mesh bags the night before?
Yes, with dry contents and moisture-proof storage, but inspect them again before use. Keep hook-attached parcels separated safely and avoid storing soaked liquid-treated bags without proving how they release after that waiting period.
Once you can make the bag or stick neatly, keep the mix simple. Choose the right weave, use modest dry feed, close it securely and check the attachment and melt in water. You don't need another liquid or powder every session. Knowing that the hook comes free matters much more.
If you are still choosing a format, compare solid bags with mesh or return to the wider PVA guide for tape and string. Keep this tutorial for constructing and testing the mesh presentation itself.