A lead clip setup needs compatible parts and a tested release action. The tail rubber controls lead retention, so its position deserves care rather than simply pushing it fully home. The lead hangs from the clip's arm, while the hooklink attaches to the swivel inside its body. The lead should release when the design calls for it, so the fit of the parts matters. We'll build one matched setup and show you what to check before fishing.
This tutorial uses the Korda Lead Clip Action Pack with the included swivel, tail rubber and tubing, fished on suitable monofilament main line. Keep those parts together for this tutorial; a Hybrid clip, quick-change swivel or leader needs a different set of instructions. Those can be valid alternatives, but their connections and release behaviour need their own instructions. Start with this one complete rig, learn what moves and only then consider variations.

Lead clip setup: how should the tail rubber retain the lead?
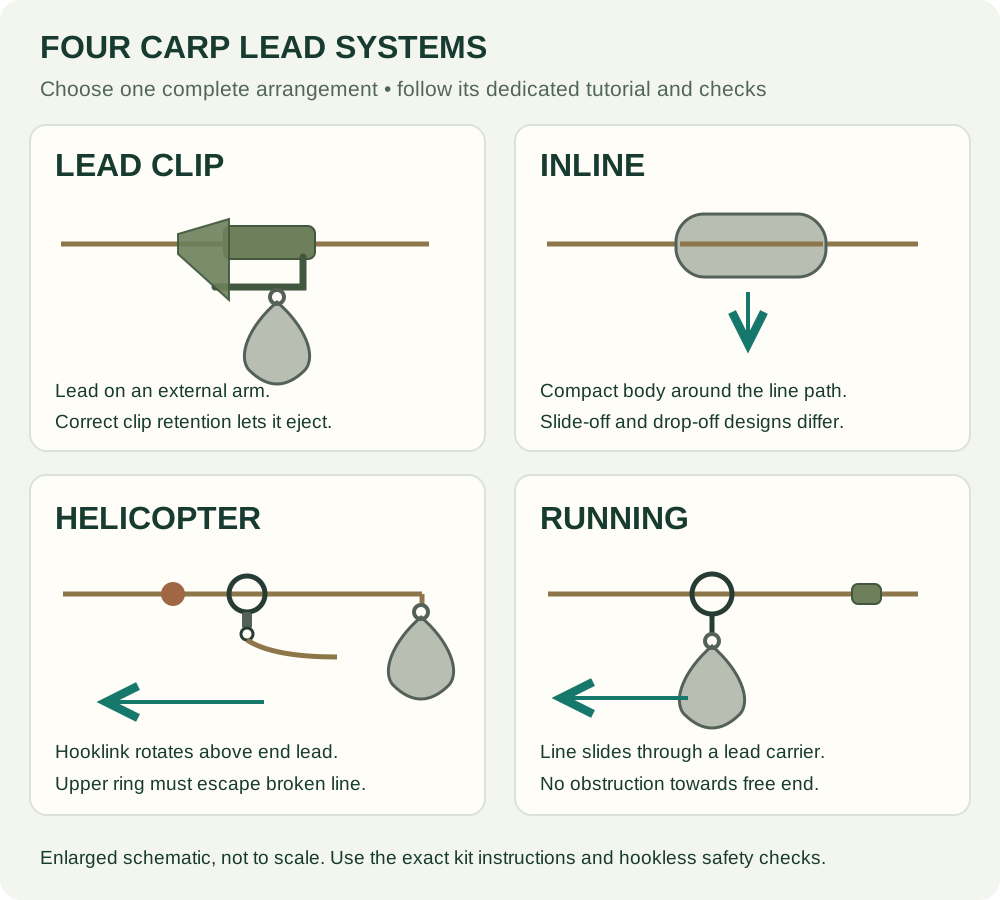
Think of the clip as two connected jobs. Its body locates the hooklink swivel, giving the fish initial resistance from the lead. Its arm and tail rubber retain the lead until the intended release force acts. On the standard Korda clip, the swivel needs to stay seated long enough for that lead to come off. If the swivel simply slides out first, pulling line through the loose clip is not the same as successfully ejecting the weight.
The arrangement doesn't guarantee a fish will rise above every weedbed, and lead loss doesn't guarantee that a remaining length of line cannot catch something. The entire setup, landing route and venue conditions still matter. A safe terminal arrangement is a last defence if something goes wrong, not permission to fish a spot from which a carp cannot reasonably be landed.
Compare the alternatives in our carp lead-systems guide. In particular, a genuinely running lead deliberately allows the line to slide through a carrier. Don't turn this clip into a homemade running arrangement by crushing the swivel or removing parts while still expecting normal lead ejection.
When this simple setup is a useful choice
A matched clip is a versatile starting point for general lake fishing, especially when a swivel lead can be changed to suit the distance or the firmness of a spot. It accepts many conventional hooklinks, including a simple coated-braid hair rig. You can practise the lead arrangement without repeatedly rebuilding the bait end.
Start on a known, reasonably clean area with an unobstructed landing route. Where there is weed, first establish that the fish can be controlled and landed; then choose release behaviour appropriate to the fishery's rules and the manufacturer's system. Thick weed that could bury a fish before you respond is a reason to find another spot, not to push this rig harder.
A clip is not automatically the best arrangement for a small solid PVA bag. An inline setup may pack more neatly. Nor does a clip stop a short hooklink being dragged into soft silt by a heavy lead. Adjust the whole presentation to the lakebed rather than asking the clip to solve every problem.
What components do I need for a matched lead clip system?
Required for this lead arrangement
- Korda Lead Clip Action Pack (paid link): use its matching clip, tail rubber, swivel and tubing together.
- A suitable swivel lead (paid link): choose a weight within the rod and line's working capability and any fishery restriction. The shape and weight are not fixed by the clip.
- Sound monofilament main line (paid link) in a suitable permitted strength and diameter. The linked bulk spool is an example, not a requirement to change serviceable line.
- A finished, tested hooklink. A simple rig uses a Korda Wide Gape X hook (paid link), N-Trap Soft coated braid (paid link), Hybrid Bait Stop (paid link) and sinking boilie (paid link).
Tools and optional parts
Sharp line scissors (paid link) and knot-pulling tools (paid link) help make and test the connections. A compatible anti-tangle sleeve (paid link) may cover the hooklink-end connection where it fits without interfering with the clip. A suitable baiting needle (paid link) mounts the boilie, and a coating stripper (paid link) helps prepare the coated-braid hooklink. No separate quick-change swivel, leader, rig ring or putty is required by this clip rig.
Amazon links are affiliate links; we may earn a commission from qualifying purchases. Check the kit contents. Use the Action Pack's supplied swivel rather than assuming another swivel of the same nominal size will fit.
For detailed hooklink tying, use the hair-rig tutorial. Keep the hook protected while assembling and checking the lead system. A ready-tied hooklink still needs inspection and doesn't remove the need to test the connection at its other end.
Before threading anything onto the line
Read the fishery rules, including its position on clips, tubing, barb types and line strength. Inspect the last section of main line between finger and thumb for roughness, flattening or whitening. Cut back damaged line generously enough to reach sound material, without compromising the amount left on the reel.
Lay out the four matched Action Pack components separately. Identify the clip's narrow line path and external arm, the swivel's two eyes and the tail rubber's open end. Work over a tray or pale mat so a dropped small part is visible. This is much easier than learning by torchlight over wet gravel.
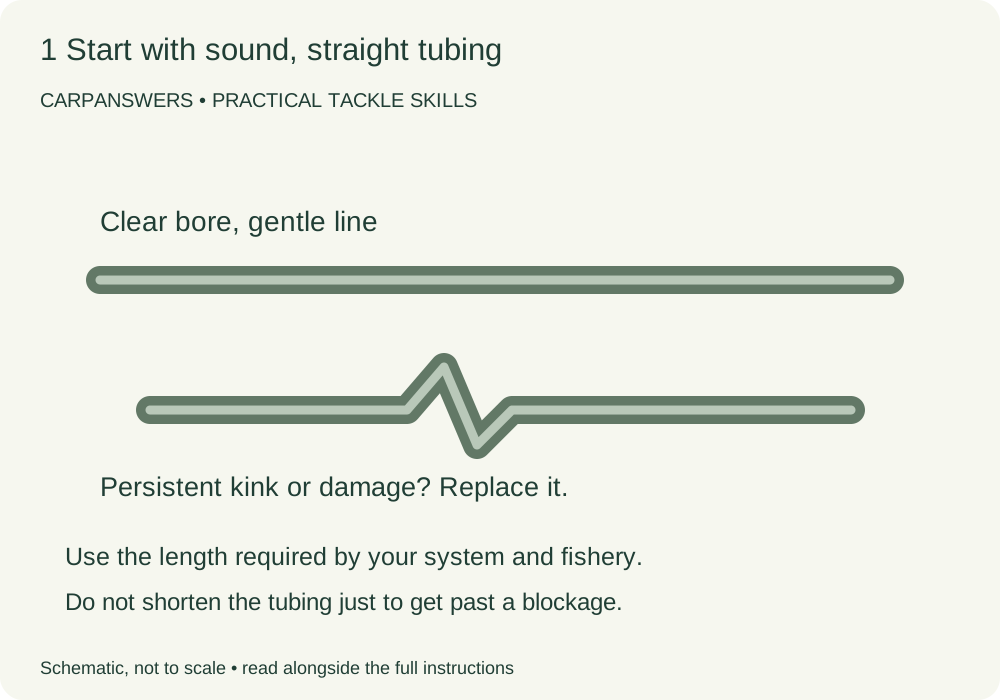
The tubing should extend beyond the hooklink when laid alongside it, helping keep the two apart during casting. Choose a practical length for that job and the fishery rules; don't add metres simply because more seems safer. Make a clean square cut without a sharp or split end, then use the packet's method to thread dry line through dry tubing.
How to assemble the lead clip setup
- Thread the tubing. Pass the main line through the supplied tubing before any knots are tied. If it will not pass, straighten the line tip, remove trapped water and retry gently. Don't pierce or split the tubing with improvised wire.
- Add the tail rubber. Its narrow end faces up the line towards the tubing; its wider opening faces the clip. Keep it pulled back while working.
- Thread the clip body. The line passes through its centre, not through the lead-retaining arm. The swivel will seat at the hooklink end of the body.
- Tie on the supplied swivel. Use a suitable, practised knot for the actual main line. Moisten before tightening, draw it down steadily and inspect the finished turns. Don't conceal a doubtful knot inside the clip.
- Seat the swivel. Pull it into the clip to the position described by Korda. Check that it is properly retained, rather than only resting at the entrance. Don't glue it or force in an oversized substitute.
- Connect the hooklink. Tie its lead end to the remaining swivel eye with a suitable tested connection. Fit any intended anti-tangle sleeve without blocking the arm or release path. Don't leave an uncovered open connector beside the hooklink.
- Fit the lead. Place the lead's swivel over the external arm. Wet and seat the matching tail rubber only as instructed for the required release. Don't automatically drive it as far on as possible.
- Locate the tubing. Seat its end in the tail rubber as the system requires, making sure the line is undamaged and no stray knot or stop has been introduced.
- Perform the checks below. Check the knots, controlled lead release, complete breakage behaviour and bait presentation separately. One successful pull on the hooklink doesn't prove all four.
If a step requires unusual force, stop. Small plastic and rubber parts can deform while still looking plausible. Check the parts against the packet, replace damaged items and ask a knowledgeable tackle shop or fishery staff member to examine your first assembly if you remain uncertain.
How to test lead release on a carp lead clip setup
Use a separate short dummy assembly made with the same line, tubing and components, with the hook omitted. Keep the lead low over a soft surface and use suitable tools rather than wrapping line around fingers. The intention is to observe the designed movement under controlled resistance, not to launch a lead or discover the breaking strain of your skin.
Follow Korda's release check for the clip: resistance applied through the hooklink swivel must allow the lead to leave its arm before that swivel pulls from the body. Observe which part actually moves first. If the swivel leaves first, merely repeating the pull more violently doesn't resolve the mismatch or seating problem.
Then consider a break above the complete arrangement using the free end of the dummy line. Confirm the intended separation without relying on a knot, tubing end or improvised stop to remain in a convenient position. Check the wet assembly too. A desk check demonstrates how the mechanism works; it cannot reproduce every submerged obstruction or guarantee safety in an unfishable swim.
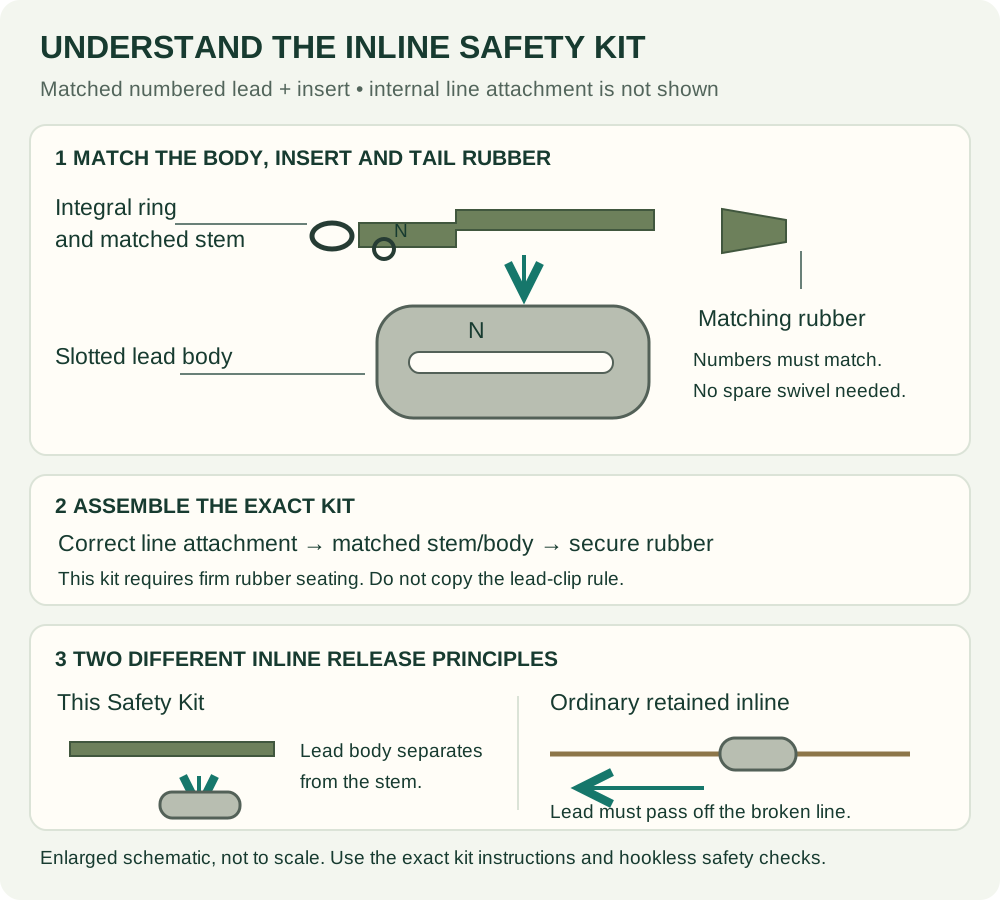
Never borrow the tail-rubber rule from a different system. For example, the numbered Korda Inline Safety Kit has different retention instructions. These are mechanically different products despite both using a rubber part with a similar name.
Changing lead weight without changing the safety mechanism
Select enough weight to cast accurately and hold the presentation where needed, while respecting the complete casting payload. A mesh bag or stringer adds load and can affect how the lead behaves on impact. Your rod's test curve is not a universal maximum casting-weight label; see our test-curve explanation.
When changing leads, slide the tail rubber back carefully, remove the old lead from the arm and inspect both contact surfaces. Fit the new lead and repeat the release check. A swollen rubber, grit inside the clip or a differently shaped swivel can change the result even though you have kept the same nominal weight.
Don't respond to nuisance lead loss by jamming the tail rubber or adding a cable tie. First review the cast, impact, payload and component condition. If your presentation repeatedly defeats the system's normal retention, choose a properly designed alternative rather than disabling its release.
A repeatable first-session routine
Before baiting up, make a controlled short cast into a safe clear area and retrieve the arrangement gently. Look for a wrapped hooklink, a displaced tail rubber or damage where the line enters the tubing. If the test is clean, bait the hooklink and check its balance in water before fishing the intended spot.
After each retrieve, repeat the small checks rather than rebuilding everything automatically. Remove grit, examine the last metre of line and test any suspect connection. Keep a spare matched clip and rubber available so a damaged part can be replaced immediately, without borrowing an unidentified component from someone else's tackle box.
Common problems and what to check
The lead falls off on the cast
Retrieve and inspect before the next cast. A damaged clip arm, perished rubber, incompatible lead swivel or heavy bait parcel can be involved. Check correct assembly and make a controlled practice cast with an appropriate load. The answer is not automatically more pressure on the rubber.
The swivel pulls out before the lead releases
Confirm it is the supplied swivel and is seated fully as designed. A partially seated or mismatched swivel defeats the ordinary clip's intended release sequence. Replace worn components; don't squeeze the swivel with pliers to create an untested hybrid of fixed and running behaviours.
The hooklink wraps around the tubing
Check the hooklink length, tubing length, sleeve arrangement and casting technique. Feathering the final flight can help straighten a suitable rig, but a short-range test cast tells you more than assuming an anti-tangle label makes tangles impossible. See the illustrated rig guide for a straightforward presentation to practise with.
The clip or tubing comes back packed with weed
Reconsider the spot. Clearing weed from the tackle after each cast doesn't establish that the hookbait was presented or that a hooked fish can be landed. Find a cleaner route and position rather than relying on a stronger line or a looser tail rubber to solve everything.
Frequently asked questions
Do I need a quick-change swivel?
No. This rig uses the Action Pack's matching ordinary swivel. Quick-change systems are convenient but require their own compatible clip and a covered connection. Adding one is a rig change, not a missing essential.
Can I put a leader above this setup?
Don't add one without checking the manufacturer's approved arrangement and fishery rules. A leader introduces a join and different diameters. Korda's Hybrid clip has an integral swivel and is a different design; it is not assembled by substituting parts into this tutorial.
Should I drop a lead on every take?
Not as a general aim. Use release appropriate to the actual conditions and venue instructions, avoiding unnecessary lead loss. Never retain a lead by defeating a safety mechanism simply to save money.
What should I learn next?
Build a reliable hooklink, practise the permitted complete setup and test the bait in water. Our hookbait mounting and balancing tutorial explains the next part of the process. A well-presented bait and a reliable lead arrangement need separate attention.
Final bank-side checklist
Before casting, check the matching parts, line and knots. Is the swivel seated correctly, the clip arm undamaged and the tail rubber in the right position? Test the release, check the hooklink and plan the landing route. Repeat after a fish, impact or component change. If you're unsure what should release, get help before using it.