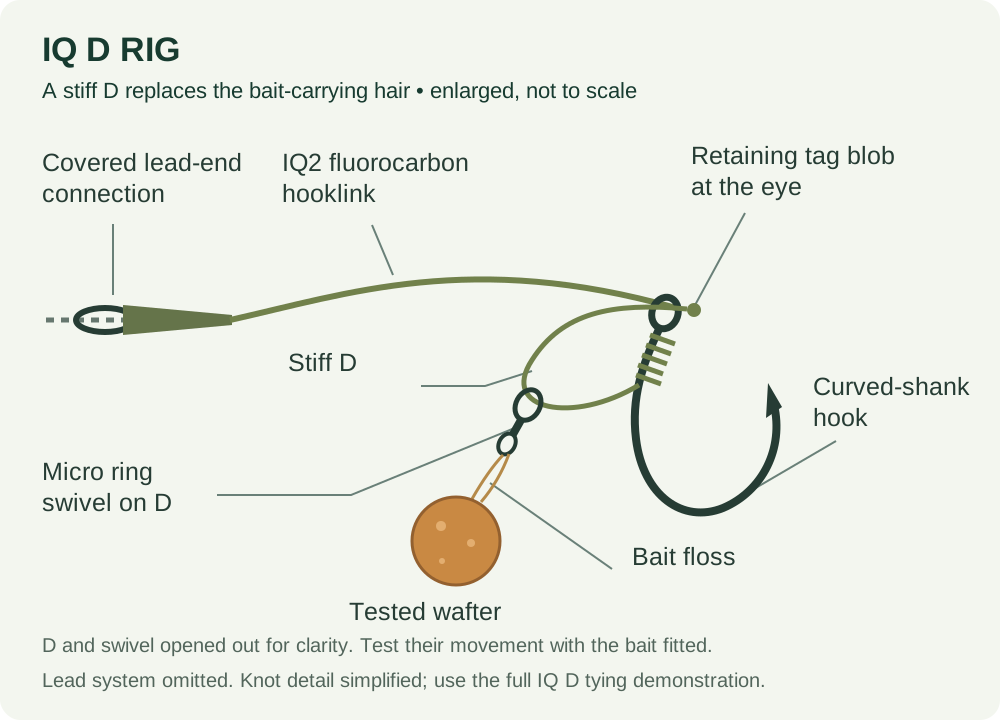
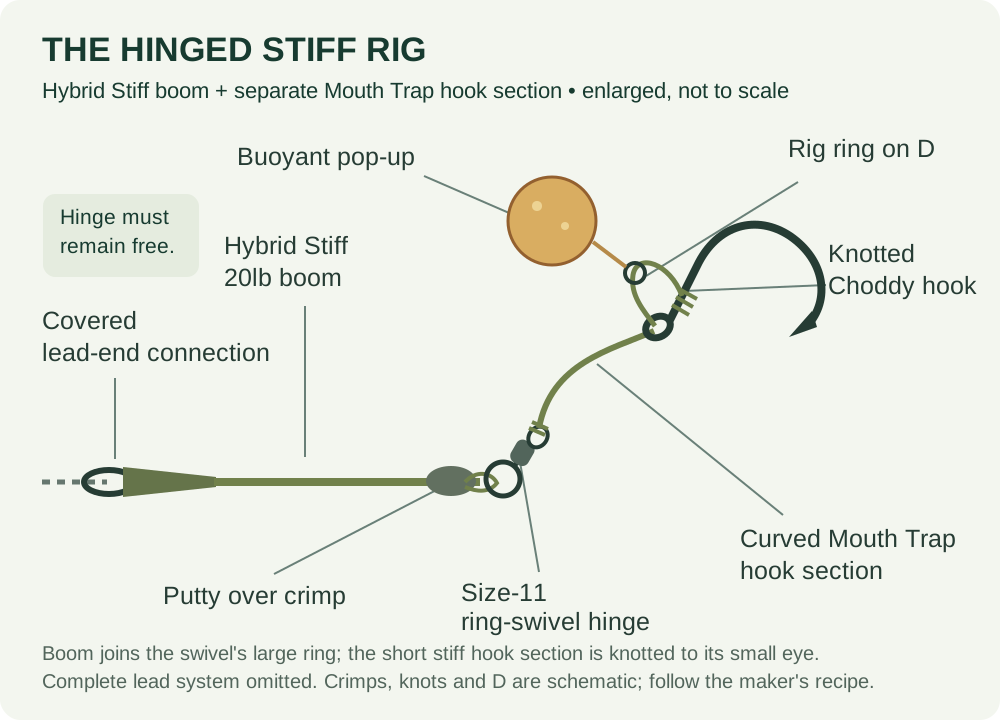
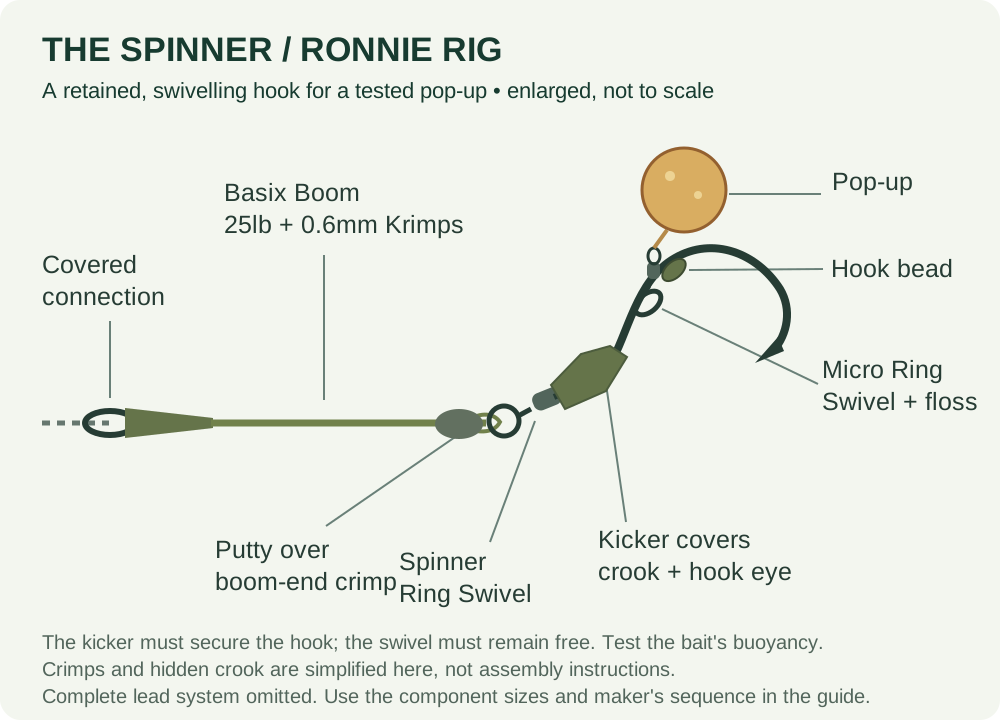
For a closer look at the parts and the Korda component list, see the illustrated Ronnie/spinner tying guide in our beginner overview. Check which version you're tying before changing its materials or connections.
Learning how to tie a Ronnie rig? We'll build this spinner-rig version with a purpose-made swivel and stiff boom, then test it with the actual pop-up. Matching the components matters just as much as putting them together.
Once you see what each part does, the layout makes sense. The hook sits on the crook of the spinner swivel and is locked in place by a correctly sized kicker. A micro ring swivel or bait screw runs on the hook shank and is retained by a hook bead, normally starting somewhere around the point opposite the barb. Balance the hookbait over the swivel and the hook section should settle slowly with room to rotate freely.
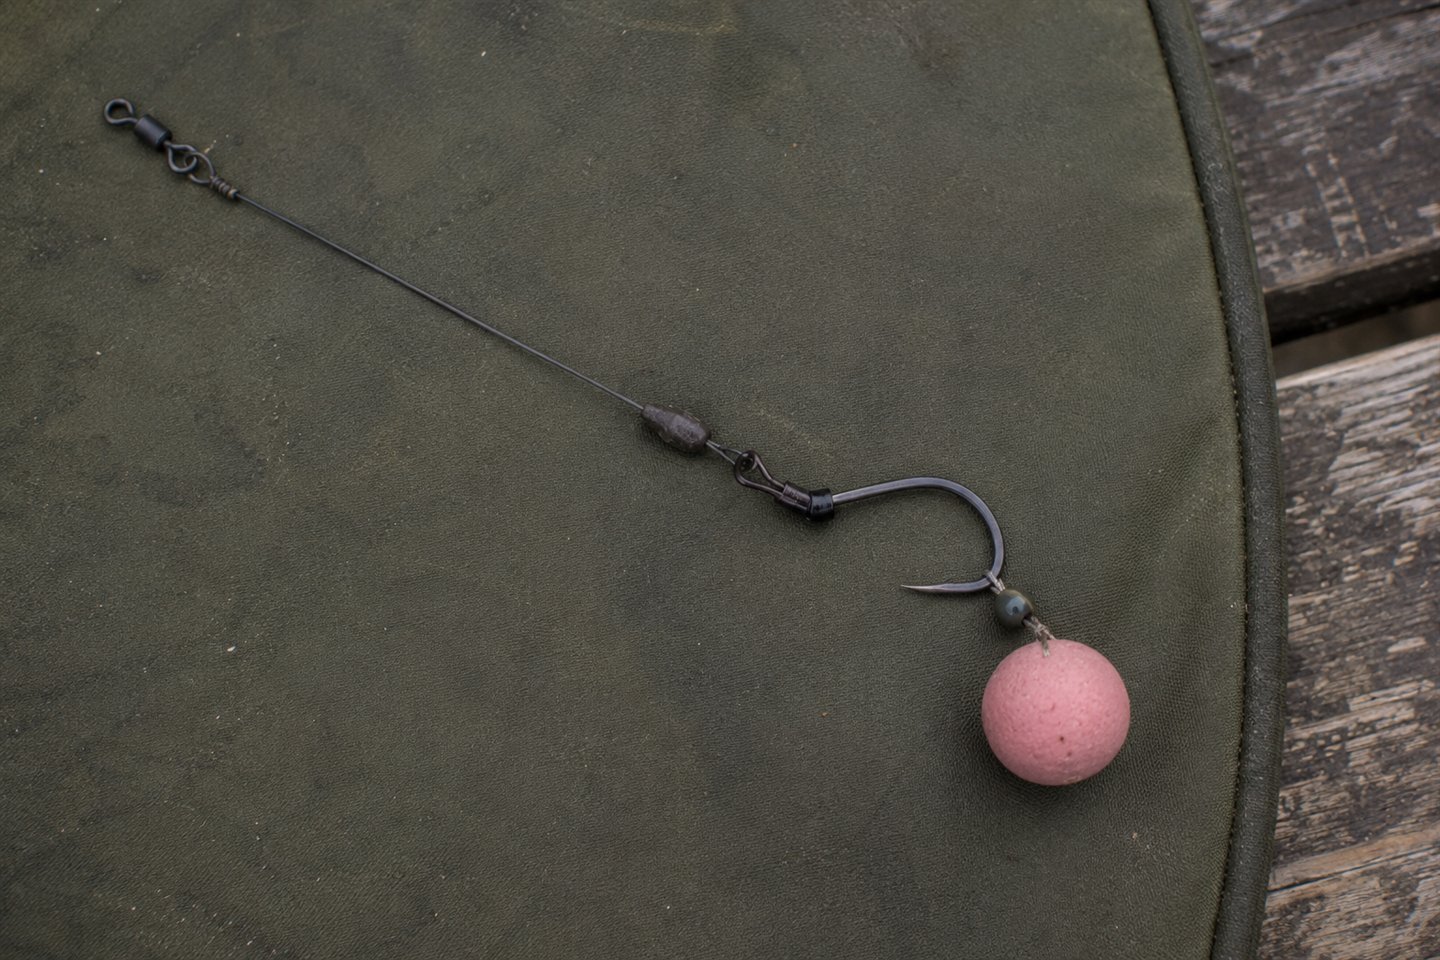
What is a Ronnie rig?
A Ronnie rig is a low pop-up presentation built around a swivelling hook connection and a boom. Spinner rig is the name now used by many tackle manufacturers for the same broad arrangement. The hook is not knotted directly to the hooklink, so a blunt or damaged hook can normally be replaced while the undamaged boom remains in use.
The swivel allows the hook to rotate, while the stiff boom helps push the hook section away from the lead as it lands. The bait attachment moves along a short section of the hook shank and stops against a bead. Together, those parts create a compact presentation that is easy to balance and repeat when every component fits properly.
That freedom of movement is useful, but keep the rig in perspective. It cannot guarantee a particular hook hold, and carp can approach, mouth and reject a bait in many ways. The Ronnie rig is a practical way to present a low pop-up or carefully balanced bait; it still depends on good location, a sharp hook and a presentation that suits the spot.
Where the Ronnie rig works best
Start by picturing the spot where this rig is most at home: relatively firm, clean ground where a stiff boom can settle without bridging over thick debris. Gravel, clay and low silt are all sensible starting points. A balanced pop-up keeps the hook point just clear of minor debris while the boom creates separation from the lead.
It can also be adjusted for light silt or scattered natural material by changing boom length, stiffness, hookbait buoyancy and lead arrangement. Those changes should respond to what you have actually found with a bare lead or marker setup. A longer boom is not automatically better over silt, and a pop-up doesn't make an unsuitable area presentable.
Dense weed, deep soft silt or a serious snag situation may need another rig and lead system entirely. If a hooked carp cannot be played and landed safely from the spot, don't fish it. Our carp rig comparison explains other presentations, while the simple hair rig tutorial is a better place to begin if you're still learning the knotless knot.
What components do I need for a Ronnie rig?
If you have seen older Ronnie-rig instructions, you may have watched a generic quick-change swivel being opened with pliers and bent closed around the hook eye. Current Korda and Fox systems use dedicated spinner swivels whose crooks are secured by a matched kicker. Build the version designed for the exact system in your tackle box instead of mixing an old swivel method with modern parts.
Think of the hook eye, swivel crook and kicker bore as a matched set. A loose kicker may expose the connection, while an overly tight one can split as it is forced over the swivel. The same principle applies to the micro ring swivel or bait screw and hook bead: the attachment needs free movement along the shank but a secure stop at the bead.
Choose the boom, crimps and crimp tool as a set
The boom is the part worth slowing down for. A stiff material gives the Ronnie rig its separation and helps it reset after disturbance. Some purpose-made boom materials are designed for crimping, but ordinary fluorocarbon, coated braid and supple hooklink are not suitable merely because they fit through a sleeve. Use a material explicitly approved for crimping and the matching crimp size.
Match the crimp tool to the same system and use the correct notch for the stated crimp. An oversized crimp may slide under pressure. An undersized crimp, or one crushed with general-purpose pliers, can cut into the boom and create a hidden weak point. Don't substitute by eye when the joint will be the connection to a fish.
Prepare the hook section before the boom
Before you start, lay out the dedicated spinner swivel, compatible hook, matched kicker, micro ring swivel or bait screw and the correct hook bead. It is much easier to follow the sequence when every part is in front of you. Give the swivel and hook a quick look in good light, setting aside any split bead, stretched kicker, distorted crook or hook without a straight, sharp point.
How to tie a Ronnie rig that settles correctly
Step 1: confirm the rules and inspect every component
A minute spent on the basics makes the rest of the tying much easier. Start with the fishery rules for the hook pattern, hooklink, leader and intended lead arrangement. Run the boom material between your fingers and set aside any scored or sharply kinked section, then spin the swivel and view the hook point under good light. Sound components give all the later detail a chance to work.
Step 2: cut the boom to a practical working length
Decide on the finished boom length for the lakebed and cut a little more material than you need. Five or six inches is a sensible first version for clean firm ground. Tie it for the spot rather than making every boom identical out of habit: the finished rig needs enough room to settle without the lead pulling the hook section into silt or debris.
Step 3: slide on the first matched crimp
Pass the boom through the exact crimp listed for its diameter, then take it through the eye of the spinner swivel and back through the crimp in the direction shown by the manufacturer. Form a neat loop that allows the swivel to articulate without leaving a large, loose opening. Keep the recommended tag rather than trimming the material flush against the metal.
Step 4: compress the crimp once and squarely
Place the sleeve in the correct notch of the matched crimp tool. Keep it centred and close the handles fully so the pressure is even. Don't partly compress it, rotate it and crush it again. Repeated or diagonal pressure can damage the crimp or boom even when the finished joint appears neat.
Step 5: form the connection at the lead end
Add an anti-tangle sleeve first if the chosen connection requires one. Form the maker-approved loop or swivel connection with a second matched crimp, setting the finished boom length before compression. Leave the lead-end loop enough room to connect and move correctly, without making it so large that it can fold unpredictably around the lead system.
Step 6: pull-test both crimped ends
Use purpose-made rig pullers and apply firm, progressive pressure. Never wrap hooklink or braid around bare fingers. Watch for the boom slipping through the sleeve, whitening beside the crimp or developing a cut surface. If either end changes, discard the whole boom and identify whether the material, sleeve, tool notch or technique was wrong.
Step 7: place the kicker on the hook
Slide the matched kicker onto the hook in the orientation shown for that product, keeping the point away from your fingers. Move it far enough along the shank that the hook eye remains accessible for the next stage. Don't stretch the bore with a needle or force a split kicker back into shape.
Step 8: mount the hook on the spinner swivel
Pass the hook eye onto the dedicated swivel crook in the direction specified by the system. Rotate it into its working position, then push the kicker back over both the hook eye and the complete crook. Turn the connection in your fingers and view it from every side. The opening needs to be fully covered, with the kicker sitting straight rather than stretched paper-thin.
Step 9: add the moving bait attachment
Slide a smooth micro ring swivel or compatible bait screw onto the hook point and move it around the bend onto the shank. It ought to travel cleanly, without scraping or sticking. A ring with a rough weld or misshapen edge belongs back in the tackle box rather than on the rig, because it can damage the hook coating or stop the hookbait moving as intended.
Step 10: fit and position the hook bead
Push the correctly sized bead onto the shank and begin with it roughly opposite the barb when the hook is viewed side-on. This is a repeatable starting position, not a measurement that suits every hook. You want the bead to retain the bait attachment securely while leaving the point and gape completely clear.
Step 11: mount the chosen hookbait
Screw the hookbait squarely onto a bait screw or attach it to the ring swivel using the method intended for that component. A gentle pull will tell you whether the bait has split or could come free during the cast. If floss needs heat-sealing, keep the heat away from hooklink material and fingers; a purpose-made bait screw avoids that stage where it suits the bait.
Step 12: counterbalance the hook section
Add a small amount of non-toxic rig putty or the system's specified weight at the approved point around the swivel or boom connection. Keep it clear of rotating parts. Begin with less than you think is required, because it is easy to add another pinch after testing and difficult to diagnose a rig that has been heavily over-weighted.
Step 13: test the complete Ronnie rig in water
This is the stage where the separate components become a fishing rig. Connect it to the intended lead arrangement and lower it gently into clear margin water. Watch the boom settle from the side, checking that the swivel still rotates, the bait attachment moves along its short section of shank and the hook point remains clear. Lift and lower it several times so you know the first tidy landing was not a lucky one.
How to balance a pop-up on a spinner rig
Watch for a low pop-up descending slowly under the combined weight of the hook, swivel and counterbalance, then sitting at the intended height without lifting the boom. The hook should not hang at an extreme angle or become trapped beneath the bait. If the bait sinks like a stone, remove some putty; if it lifts the boom, add a small amount or try a less buoyant bait.
A balanced wafter version needs even more careful testing. It should reduce the effective weight of the hookbait while still returning to the lakebed consistently. A wafter that lifts the hook or stands the whole hook section upright has not become more sensitive; it has changed the presentation into something you did not tie.
Adjust the hook bead without closing the gape
The hook bead controls how far the bait attachment can travel around the shank. Starting opposite the barb gives the bait room to move while keeping it away from the eye. Moving the bead farther towards the bend can change the angle and separation, but too far may allow the ring or bait to crowd the gape.
Adapt the spinner rig to the lakebed
Firm gravel, clay or a clean polished area
A stiff boom of moderate length can kick the hookbait away from the lead and lie neatly on firm ground. Confirm the area with several casts because one hard drop only describes where that lead landed. Small stones or ridges can hold a very short boom awkwardly even though the spot feels generally firm.
Light silt
A slightly longer boom or a less aggressive material may follow the contour better. Lead weight and shape matter because a heavy compact lead can plug into soft silt and drag the boom down behind it. Learn the approximate depth and consistency of the silt before deciding that the pop-up will solve the problem by itself.
Leaves and low natural debris
A carefully balanced pop-up can keep the hook point above a light covering, but the swivel and boom may still collect material. Lower a spare rig into similar debris at the edge if that can be done safely. A small piece of dissolving PVA foam around the hook can protect the point during the cast where fishery rules allow it.
Low or scattered weed
Check whether the boom can settle between stems without bridging. A more supple or longer version may help, but dense weed can still mask the hook and create unsafe playing conditions. Use a presentation and lead system specifically suitable for the weed, remain close to the rods and avoid any line that would pull a hooked carp through an uncontrolled snag.
Why the boom material matters after casting
Think of the boom as reusable, not permanent. Let its condition decide when it is finished rather than trying to keep a tally of captures. After every carp, snag or heavy landing on hard ground, run your fingers along it and make a fresh pull test. A scored surface, whitening beside a crimp or a loop that has changed shape means it is time to tie another boom.
The replaceable hook is a convenience, not permission to use the boom indefinitely. When fitting a new hook, ease the kicker back, remove the old hook from the crook and look over both the swivel and kicker. A stretched or split bore calls for a fresh kicker, followed by another water test with the new hookbait balance.
Casting the Ronnie rig without tangles
A stiff boom gives you useful separation before you have even cast, but the landing still matters. Feather the line before the lead touches down so the boom extends instead of folding around the lead, then feel it down on a firm line without stopping it so harshly that the rig swings a long way back towards you.
If the lead doesn't land with the expected sensation, wind straight in for a look. Dragging the rig across the spot in search of harder ground can blunt the hook, collect debris and move the presentation away from the bait. Feel the hook point and boom, then recast to the measured line.
The lead system completes the safety setup
The Ronnie rig is only the final section between the lead arrangement and hook. A running lead, lead clip, helicopter system or another fishery-approved setup must suit the lakebed and allow the lead to behave safely after a main-line break. Use compatible parts and follow the manufacturer's complete assembly rather than mixing clips, swivels and tail rubbers because they appear to fit.
Don't force a tail rubber tightly onto a lead clip simply to avoid losing a lead. In weed or snags, the ability to discharge the lead may be important, but the exact setup should follow the venue's rules and current manufacturer guidance. Test the action with the real line, swivel and leader before fishing.
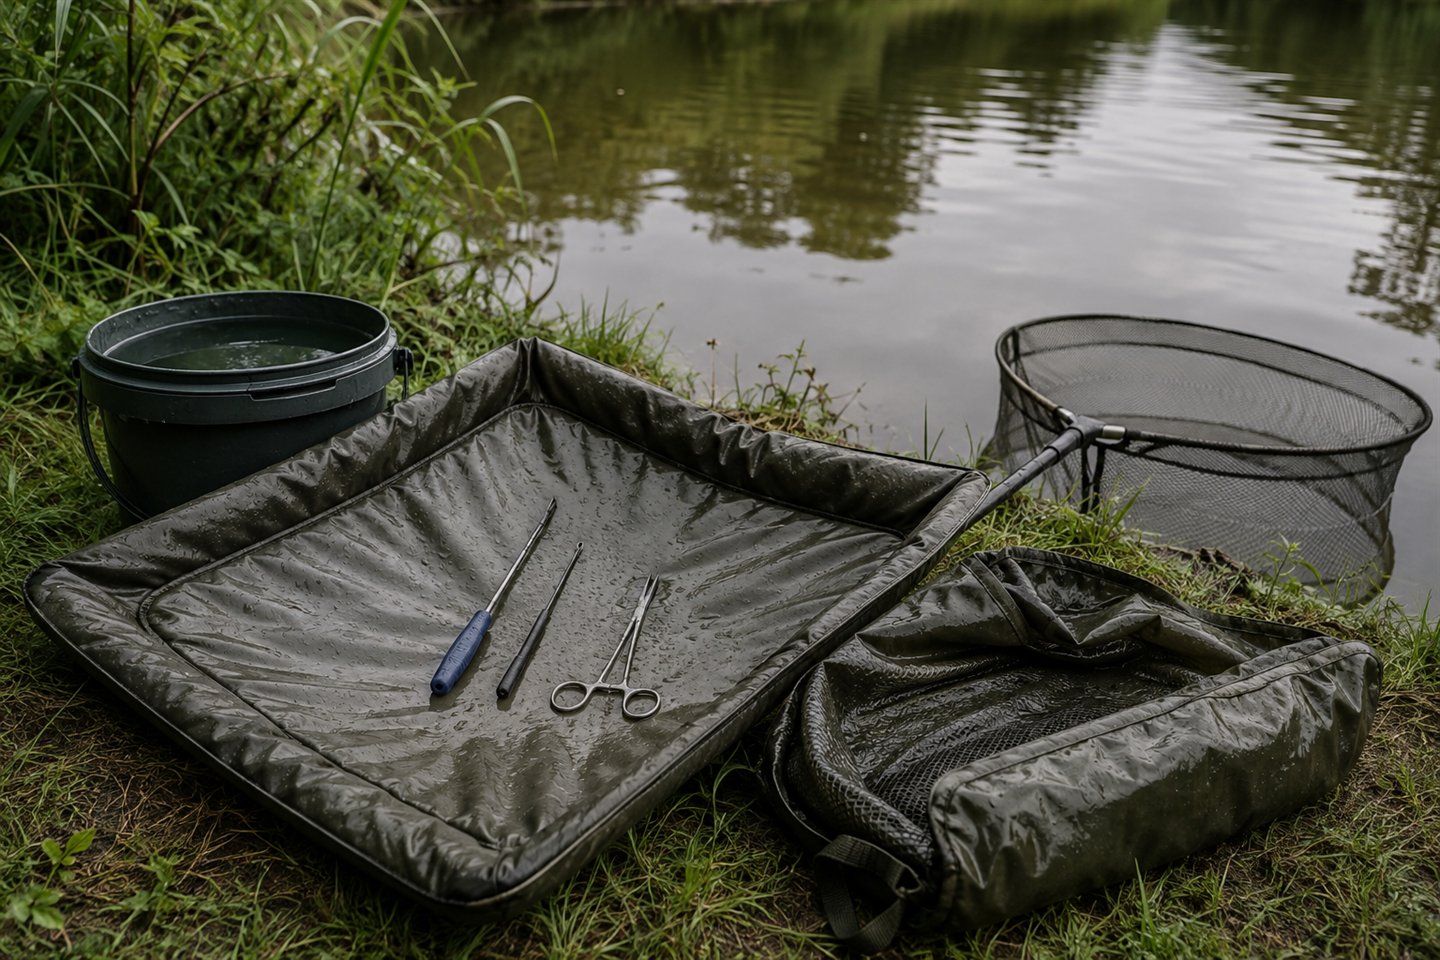
Prepare the landing net, wet unhooking mat or cradle, sling if permitted, forceps and water before casting. Stay close enough to respond to the rods immediately, especially near weed or any feature that could restrict a fish. A carefully tied rig doesn't make an unattended or badly positioned rod safe.
Common Ronnie-rig mistakes
Mixing components from unrelated systems
A swivel, kicker and hook can look compatible while leaving a small gap at the crook or placing too much stress on the hook eye. Use the sizes and combinations stated by the manufacturer. If the connection can work loose during a firm hand test, it cannot be trusted in the lake.
Using the wrong crimp or tool notch
A poor crimp may slip cleanly or damage the boom where the failure is difficult to see. Match all three parts, compress once and pull-test progressively. Never repair a suspect crimp by squeezing it again with pliers; cut it off and make a new boom.
Leaving the spinner crook exposed
The kicker should cover the hook eye and full swivel crook so the hook cannot leave the connection. If it rides back after movement, the bore or orientation may be wrong. Replace it with the correct part instead of holding it in place with an improvised addition.
Using too much putty
An oversized counterweight can make the bait plunge, restrict the swivel or fall away during casting. Add putty in small amounts and mould it securely at the approved point. Recheck the balance after the bait has been in water because buoyancy can change.
Assuming the rig suits every bottom
This is where location matters more than clever tying. A perfectly built Ronnie rig can still be poorly presented in deep chod, heavy weed or very soft silt, so find the spot first and tie for that bottom. If the rig cannot settle cleanly or a hooked carp cannot be landed without putting it in danger, choose another area or another presentation.
Frequently asked questions about the Ronnie rig
Are the Ronnie rig and spinner rig the same?
The names are commonly used for the same broad presentation: a hook mounted on a spinner-style swivel at the end of a boom. Individual versions differ in hook, kicker, bait attachment, counterweight and boom connection, so follow the instructions for the exact components rather than assuming every diagram is interchangeable.
Can I use a bottom bait on a Ronnie rig?
The rig is primarily associated with a low pop-up, and a carefully balanced wafter can also be used in some current systems. An ordinary heavy bottom bait changes how the hook section sits and removes much of the intended balance. Test any variation in water and choose a simpler hair rig when a true bottom bait is the aim.
How long should a Ronnie-rig boom be?
Five to six inches is a useful starting point on clean firm ground, not a compulsory length. Depth of silt, debris, lead arrangement and the space available on a clean patch all affect the decision. Tie a few controlled variations and compare how they settle rather than copying a measurement without context.
Final thoughts on tying a Ronnie rig
Once the sequence is familiar, tying a Ronnie rig becomes a straightforward routine. Build the boom with the specified material, crimps and tool; lock the hook onto a dedicated spinner swivel with the correct kicker; position the bead so the bait attachment stays secure; and balance the real hookbait in water.
Give the finished Ronnie rig a proper check: sharp hook, free movement, balanced bait and a lead system suited to the spot. Check again after each cast and fish. Once you're comfortable with those details, it becomes much easier to tie and use. Keep it to spots where you can present the bait and land a carp safely.
Further reading and source checks
For current component sequences, see Korda's guides on how to tie a spinner rig and when to use the presentation, together with the Fox Edges spinner-rig configuration. The Angling Times Ronnie-rig feature and Sticky Baits spinner discussion provide further presentation context.
The complete rig also depends on the lead arrangement. Korda's overview of choosing a carp-fishing lead system explains why the lakebed and compatible parts must be considered alongside the hooklink.