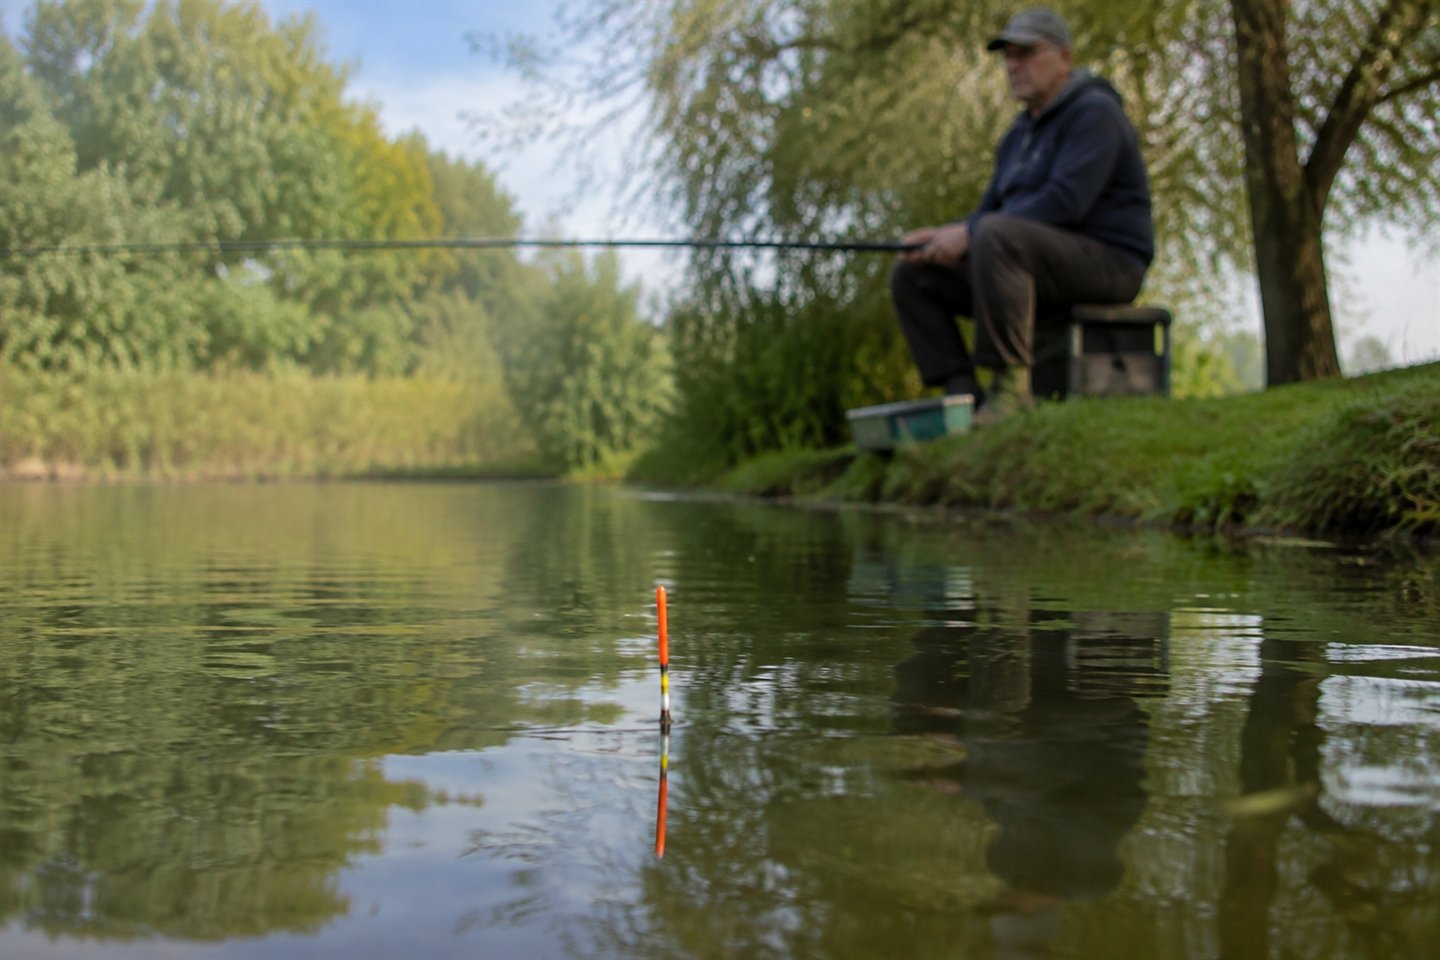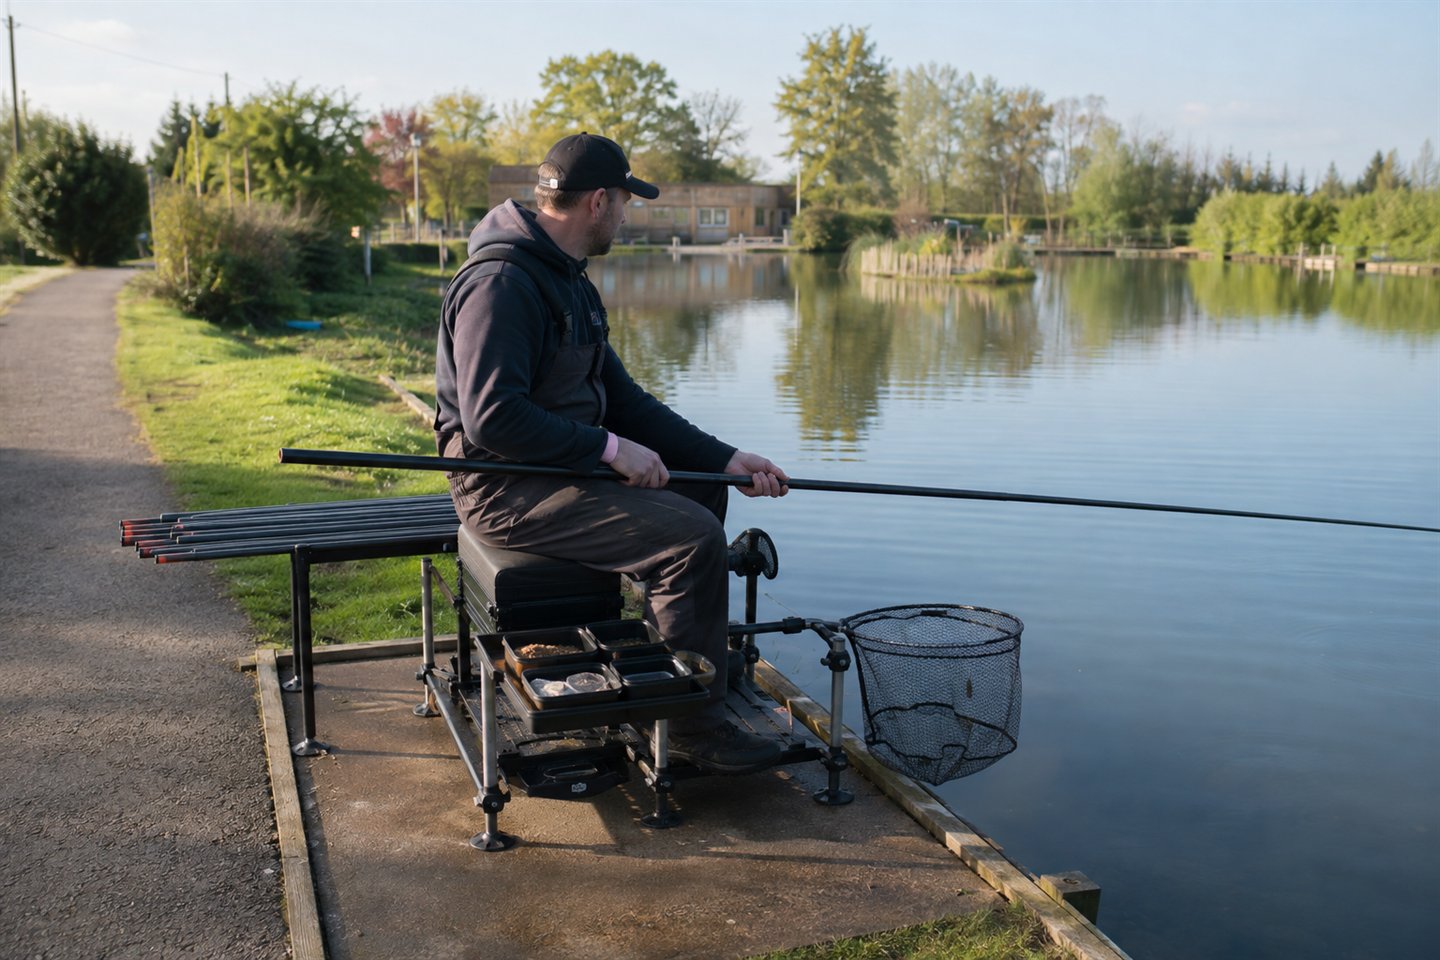
Starting pole fishing? You don't need to push out every section on the first trip. Fish a comfortable distance while you learn to place the rig, feed one spot and land fish. We'll explain the elastic, top kits and tackle that make those first sessions easier.
A take-apart pole has no reel. Sections are added to reach the fishing distance and removed, or shipped back, after a fish is hooked. Elastic fitted inside the top kit stretches under load, protecting the hooklength while the rigid pole gives precise control over the float and bait.
We'll focus on mixed coarse fishing for roach, skimmers, perch, tench and similar fish. The pole, elastic and rig need to work together, so check the maker's guidance rather than choosing an elastic by colour alone. A tackle shop or coach can help match your first top kit.
Pole fishing for beginners: what goes into your first setup?
Buy or borrow a matched package from a recognised maker, ideally with at least one correctly elasticated top kit, a protective holdall and clear compatibility information. For the first session, use a length that can be shipped smoothly, a ready-made rig suited to the depth and conditions, and balanced line strong enough for the likely fish.
Plumb the spot carefully, set the float so the bait fishes on or just off bottom, and feed a small accurate amount. Lower the rig into place rather than swinging it wildly. On a bite, lift firmly, keep the pole low enough to control the elastic and ship back over a roller until the top kit can be separated safely.
Never fish, assemble or carry a carbon pole near overhead power lines. Electricity can arc without direct contact. Inspect the route before unloading, carry long sections horizontally and leave any peg that conflicts with safety signs, fishery restrictions, towpath traffic or an approaching electrical storm.
Why use a pole for coarse fishing?
A pole presents the rig directly beneath its tip. That removes much of the casting variation found with rod-and-reel methods and makes repeated feeding to a small area easier. Depth adjustments of a few centimetres, controlled lifting and a steady bait can all be reproduced accurately.
This control is useful on canals, ponds and commercial fisheries, but it doesn't make pole fishing automatic. Fish still need to be located and fed sensibly. Wind, depth, bank space, boat traffic and the size of expected fish determine whether a pole is the right tool.
A short whip is simpler for very small fish close in, while a float rod covers water that cannot be reached or shipped safely. The coarse fishing beginner's guide places pole fishing alongside the other main methods so a newcomer can choose rather than buy by fashion.
Take-apart pole, whip or margin pole?
A take-apart pole consists of tapered sections that fit together. The upper sections form a top kit, which carries the elastic and connects to the rig. Longer butt sections extend the reach. The angler normally ships the pole backwards over a roller, removes sections at a chosen joint and plays the fish on the shorter top kit.
A whip is usually shorter and has line attached at or near the tip, with little or no working elastic. It is excellent for learning to catch small silverfish quickly but cannot provide the same control over a stronger fish. The whip fishing for beginners guide explains that lighter system.
A margin pole is built for strength at short range and is often associated with powerful commercial-fishery tactics. It may be a practical tool where larger fish are expected, but it is not automatically the best all-round beginner pole. Its shorter reach and heavier build can limit delicate mixed-fish work.
What to look for in a first pole package
Usable length and stiffness matter more than the number printed on a bag. A budget pole may be sold at 10, 11 or 13 metres yet feel increasingly heavy and soft at full extension. Test one assembled when possible. A pole that remains comfortable at eight metres will teach better control than a nominally longer model that is exhausting.
Check exactly which top kits are included, their stated elastic range, whether bushes and puller slots are factory fitted, and whether spare sections remain available. Packages vary: photographs may show accessories that are not supplied. Compatibility between generations or ranges must be confirmed with the manufacturer or retailer.
A first package also needs a way to support sections, ideally a roller, plus a safe place for top kits and rigs. A seatbox is optional; a stable chair and correctly positioned rests can work for pleasure sessions. The bank layout must allow sections to travel without scraping a path, striking people or blocking access.
An Amazon UK search for a coarse-fishing pole starter package (paid link) can help compare stated lengths and included kits. Verify every component, elastic rating, warranty and replacement-section route on the actual listing before ordering.
What is a top kit in pole fishing?
The top kit is the upper working part of the pole. Match kits are generally intended for finer elastics and lighter work; power or carp kits have larger bores and stronger construction. Those labels are not universal engineering standards. Use only the elastic range and configuration approved for that specific kit.
Some kits are supplied as two sections and others include an additional section. Cutting a tip back to fit a larger bush changes length and may remove material permanently. A tackle shop or qualified coach can fit a first kit accurately, preserving the maker's limits and ensuring that cut edges are smooth.
Multiple top kits let an angler prepare different rigs and elastics before fishing, but one correctly matched kit is enough to learn. Label it with the elastic type and inspect joints, bush, puller and connector before every session. Never interchange an unidentified top section because it appears to fit.
Solid, hollow and hybrid pole elastic
Solid elastic is simple, relatively inexpensive and available across many strengths. Hollow elastic contains an air space and often stretches progressively over a wider range. Hybrid or solid-core products offer another response. None is inherently safest without considering the pole, length fitted, lubricant, tension and expected fish.
Elastic ratings are not directly comparable between every brand. A number, colour or diameter can mean something different in another range. Follow the pole and elastic manufacturers' charts, then balance the rig line, hooklength and hook. Avoid copying a rating from a video that used a different kit and venue.
For small roach and skimmers, a light elastic lets fish remain under control without bouncing from the water. Mixed venues need enough reserve for a surprise tench or modest carp, but excessively powerful elastic can transfer force to fine line and cause hook pulls. When large fish or heavy snags dominate, seek venue-specific advice and use suitable stronger equipment.
Bush, connector, bung and puller
The elastic leaves the tip through a smooth internal or external bush. Any sharp edge can abrade it, so inspect the bush under good light. The rig may attach using a connector, Dacron-style connector or another compatible system. Close it fully and keep the rig line clear of moving parts.
At the other end, a bung anchors the elastic inside the kit. A side puller or puller bung also allows the angler to draw elastic through while playing a fish, shortening the working length and increasing control near the net. Fit only components intended for the kit's internal diameter and reinforced area.
Initial tension should remove loose elastic from the tip without making the system unnaturally tight. Elastic hanging out indicates too little tension or a maintenance problem; elastic that retracts violently can be over-tensioned. Manufacturer instructions and a competent tackle shop are the appropriate references for the selected components.
Preparing and maintaining elastic
Elastic needs a clean, unobstructed route through the kit. Use the lubricant recommended for the material and keep grit away from the bush and puller. Before fishing, pull out a controlled length by hand, check that it returns smoothly and look for flattened, cloudy, split or rough areas.
Replace damaged elastic and any connector with a worn hinge or sharp edge. Age, sunlight, storage and heavy use affect service life, so no calendar interval covers every system. Record when a kit was fitted and inspect by condition rather than waiting for it to fail under a fish.
Don't store top kits wet inside sealed tubes. Clean and dry them according to the maker's directions, protect protruding pullers and loosen any arrangement that the manufacturer says should not remain tensioned. Never apply an unapproved oil or solvent merely because it makes the elastic feel slippery.
How to set up a simple pole fishing rig
A pole rig consists of a float, main rig line, shot or non-toxic weights, a hooklength and hook. Its length must exceed the swim depth enough to leave a manageable section between pole tip and float. Too much line reduces control; too little makes lifting and surface movement unnatural.
Choose float capacity for depth, wind, tow and bait. A slim, light float suits calm shallow water; deeper or moving water needs more positive loading. The body shape, stem and bristle affect stability, but a clearly visible float that settles consistently is preferable to a delicate pattern that the beginner cannot read.
Use a bulk with smaller droppers for a forgiving starting arrangement. The bulk takes bait down; droppers register the final fall. Shot must be legal, correctly sized and pinched without crushing the line. Keep the hooklength join clear. The depth and shotting guide gives a fuller adjustment process.
Ready-made rigs remove some first-day assembly, although they still need checking. Confirm line diameter, hook size, float capacity, rig length and knots rather than trusting the word “starter”. Compare NGT ready-made coarse pole rigs (paid link) by those specifications and store them on labelled winders.
Balancing line, hooklength and hook
The rig line needs enough strength for striking, wind and repeated handling, while the hooklength is often slightly finer to provide a replaceable lower section. Neither should be so weak that normal fish contact causes breaks. Snags, mussels, reeds and larger fish demand stronger choices or another peg.
Hook size follows bait and fish, not a universal table. A single maggot and a small soft pellet present differently; a worm section needs room in the gape. Use the barbless or hook rule imposed by the venue. The coarse hook guide explains why printed sizes differ among patterns.
Test every knot with steady pressure before attaching the rig. If line curls where shot was moved, replace that section. Discard offcuts into a secure container and take them home. A balanced rig should yield through its intended weakest point rather than leave a long unknown length attached to a fish.
Set up the bank before assembling the pole
Look up and around before opening the holdall. Carbon-fibre poles conduct electricity, and high voltage can arc through air. Don't fish near overhead power lines, even if an apparently convenient peg is open. Follow warning signs and the fishery's exclusion distances, and carry sections horizontally.
Place the seat on firm, level ground. Position the roller directly behind or slightly to one side of the shipping line, high enough that sections clear vegetation without becoming unstable. Keep the landing net, bait, disgorger and wetted unhooking surface within reach.
On a public towpath, the pole must not create a permanent obstruction. Canal & River Trust guidance accepts shipping back but requires anglers to share the space. Stop and make the situation safe for pedestrians, cyclists and boats; an uninterrupted fishing rhythm never has priority over other users.
A stable Olax coarse-fishing pole roller (paid link) should be compared by width, adjustable height, leg security and packed size. Use it within the instructions, weigh or peg it only as designed and replace rough rollers that could score a section.
Plumb and mark the depth
Attach a suitable plummet to the hook, lower the rig at the chosen distance and adjust the float until bottom contact is clear. Check a small area rather than one point. A shelf, hollow or patch of weed can change the best presentation by enough to matter.
Once the rig is set, mark the depth against the top kit with an approved removable marker or note the position against a joint. This makes it quicker to restore after a tangle and lets you explore slightly shallower or deeper water deliberately. Avoid solvents or permanent marks that damage the finish.
Start with the bait touching bottom or just clear for mixed silverfish. For skimmers, tench or a moving tow, a measured amount of line on the bottom may settle the bait. If the float drags, fails to cock or gives constant false bites, re-plumb rather than feeding over an uncertain rig.
Feeding accurately
Cup, pot or throw a conservative amount of permitted bait to the exact pole line. Loose maggots or casters can then be introduced little and often, while groundbait or pellets may form a compact starting area. The coarse baits guide helps choose simple, manageable options.
Accuracy doesn't require every particle to land on a coin. It means understanding the intended area and repeating it. Feed slightly wider when searching for scattered silverfish; tighten the spot when bites become regular. Measure quantities so the response can guide the next decision.
If bites slow, change depth or presentation before automatically adding more. Feeding can draw fish off bottom, attract small fish or fill a quiet shoal. A second line at shorter range gives an alternative, but beginners should establish one working line before managing several.
Lowering the rig and striking
Hold the rig securely while extending sections over the roller. Keep the hook away from clothing and skin. Lower the float vertically into the swim where possible, allowing shot and bait to settle in order. A long uncontrolled pendulum can hook vegetation, people or the pole itself.
Keep the pole tip close enough to the surface for direct contact without submerging excessive carbon. Follow drift or tow with a small movement. When the float gives a positive dip, lift smoothly. A sharp overhead sweep can drive a small fish into the air and endanger anyone behind.
If a tiny fish leaves the water, guide it to hand without allowing it to strike the pole. For anything with weight, let elastic extend and keep the fish in water. The elastic should absorb the first movement while the pole angle directs the fish away from hazards.
Shipping back and landing a fish
After hooking a fish, bring the pole low and guide it onto the roller. Move sections backwards smoothly, watching the joints. At the chosen point, separate the pole without twisting or levering. Place the butt sections securely so they cannot roll into the water or across a path.
Play the fish on the top kit. Use a puller only when control and manufacturer guidance allow, drawing elastic gradually and never wrapping it around fingers. If the fish surges, release controlled elastic. Trying to drag a strong fish straight to the surface risks a hook pull or break.
Use a soft, knotless landing net for fish too large to lift safely. Guide the fish head first over the frame, then keep it low for unhooking. Don't lift a large fish by raising a long pole overhead. The coarse fish-care guide explains safe handling and return.
Wind, rain and difficult conditions
A long pole catches wind and magnifies movement at the tip. Shorten the pole until it can be held securely, lower the tip and choose a more stable float. Don't grip so hard for so long that control deteriorates. A rod-and-reel method may be the better choice in a strong crosswind.
Rain makes sections and joints slippery. Keep a clean towel available for hands, but don't rub grit into carbon. Stop during lightning or when thunder approaches, lay equipment safely and move to proper shelter according to fishery guidance. Carbon should never be treated as safe because the storm seems distant.
Cold conditions can stiffen hands and elastic, while heat and sun affect fish care. Shorten the session, prepare tools and reduce handling. If fish are distressed or venue staff suspend fishing, stop immediately. Catch rate cannot override welfare or safety.
Common beginner mistakes
Fishing too long too soon causes many other errors: poor feeding, damaged joints, an awkward strike and uncontrolled shipping. Remove a section and regain accuracy. Length can be added when the roller position and movement are smooth.
Another mistake is using elastic as a substitute for balanced tackle. Powerful elastic with fine hooklength can break line abruptly; weak elastic near snags may not control a fish. Treat pole, kit, elastic, rig and peg as one system and ask a reputable shop to check the first setup.
Finally, don't swing every fish to hand. Small silverfish may be lifted only when the tackle, fish size and clear surroundings make that controlled. Net larger or lively fish. Keep the landing net assembled before fishing rather than trying to extend it while holding a top kit.
A simple first-session plan
Fish at five or six metres if that is comfortable, even when the pole reaches farther. Plumb one line, introduce a small amount of bait and begin with a hookbait such as maggot where allowed. Repeat the lowering point and give the rig time to settle.
After several bites or a quiet spell, make one change: adjust depth, move a dropper or alter the loose-feed rhythm. Keep the distance constant. Practise shipping back with an unbaited hook when the swim is empty so the movement is familiar before a better fish arrives.
Finish while concentration remains good. Inspect the elastic and joints, wind the rig under light tension onto a labelled winder, dry the kit and collect every piece of line and bait packaging. A tidy routine protects equipment and makes the second session easier.
Frequently asked questions
What length pole should a beginner buy?
Choose a usable package rather than the longest label. Around 8 to 10 metres offers ample learning range on many venues, while a longer package may provide room to progress. Test balance and confirm included top kits and spare-section support.
What pole elastic should a beginner use?
There's no brand-independent number. Match the elastic maker's stated range to the approved top kit, likely fish, hooklength and venue. For mixed silverfish, favour a forgiving light-to-medium arrangement fitted and checked by a competent shop or coach.
Do I need a puller kit?
No, but a properly fitted puller can improve control near the net and increase the useful range of an elastic. Use only a kit designed and reinforced for it, and learn how to release as well as draw elastic.
Can I use a ready-made pole rig?
Yes. It still needs to match depth, float capacity, line, bait and fish, and every knot should be tested. A ready-made rig saves assembly time but doesn't remove the need to plumb and balance it.
Final thoughts
Pole fishing for beginners is precise, rewarding coarse fishing when the setup remains within comfortable limits. Start short, use a matched elasticated kit, plumb one spot and feed it deliberately. Smooth handling will catch more than strained extra reach.
Check above you before assembling the pole, keep paths clear and have the net ready. Look after the elastic and replace it when its condition calls for it. Start at a comfortable length and enjoy placing the rig accurately. Longer poles and extra top kits can wait until you actually need them.