Already tying a hair rig and wondering what a kicker does? A line-aligner rig changes the angle at which the hooklink leaves the hook. We'll start with a coated-braid hair rig and a purpose-made kicker that fits the hook properly. It's a small change you can see and test for yourself, with the basic knots and bait choice still just as important.
The flipper rig belongs in the same conversation, but does something different: a short piece of silicone positions the hair on the hook. This guide explains both, teaches the simple kicker rig first and shows what needs to change for a silicone-controlled hair. If these are your first rigs, start with our hair-rig tutorial, then use the complete beginner rigs guide to compare the alternatives.
Line-aligner, kicker and flipper: what is the difference?
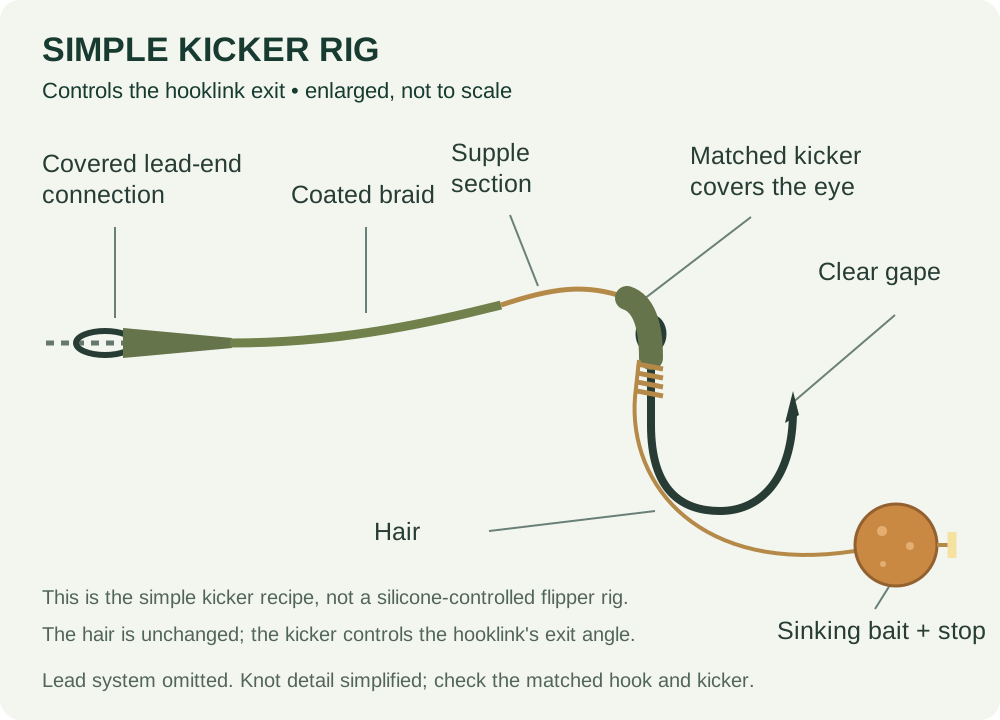
Rig names become confusing when the same term is used for a component and for the entire presentation. Think about which piece of line is being controlled. A kicker fits over the hook eye and extends the path taken by the hooklink. A traditional line-aligner can use tubing with a deliberately positioned exit. The exact tubing construction matters; it is not reproduced merely by pushing any rubber sleeve onto any hook.
A flipper's small silicone section sits farther around the hook and holds the hair at the chosen exit point. The hair still carries the bait on its own loop. The silicone is not the knot securing the hook. A flipper can also have an eye extension, so looking only for green tubing in a photograph will not identify which job each piece performs.
The simple rig here uses one matched kicker and leaves the basic hair arrangement unchanged. It doesn't add a moving blowback ring, a swivel on a D or a spinner swivel at the eye. Those are useful constructions in their own right, covered in the blowback guide, IQ D guide and Ronnie-rig tutorial. Combining their components without understanding the result is not an upgrade.
When this simple bottom-bait rig is a sensible choice
Begin with a spot where a sinking bait and hook can settle without becoming buried or masked. A known clean margin or relatively even clear patch makes the presentation easier to understand and check. The kicker controls an angle at the hook; it doesn't hold the whole hookbait above leaves, lift it out of weed or tell you whether the lead has landed in soft material.
It is also a useful learning step for someone who can already reproduce a neat hair rig. Tie one plain example and one with the matched kicker, using the same hook, bait and hooklink. Compare the assembled components in water and learn what the additional part changes. A comparison at the table is useful practice, but it cannot demonstrate that one version will catch more carp.
Avoid using this as a universal solution on thick weed, in heavy debris or near snags from which a fish cannot be landed. If the fishery bans a particular hook pattern, barb type or extension, choose a permitted complete alternative. A rig being common elsewhere doesn't override the rules of the water you're actually fishing.
Complete component list for the simple kicker rig
The bait-presenting hooklink
- Korda Wide Gape X hook (paid link), using the size-6 example with the medium kicker below and a permitted barb option.
- Korda N-Trap Soft coated braid (paid link), in a strength allowed by the fishery and suitable for the complete setup.
- Korda medium Kicker (paid link), matched to this hook size rather than selected by colour alone.
- Korda Hybrid Bait Stop (paid link) and a suitable Mainline sinking boilie (paid link). The linked 20mm bait requires enough hair clearance and an appropriate hook.
- Korda anti-tangle sleeve (paid link) and Korda size-8 quick-change swivel (paid link), only where the selected lead arrangement accepts this exact connection.
Tools
RazorBlades scissors (paid link), Korda Strippa (paid link), a suitable baiting needle (paid link), a pair of Korda Pulla tools (paid link) and a container of water. No lighter or steaming operation is required for the purpose-made kicker rig.
Amazon links are affiliate links; we may earn a commission from qualifying purchases. Check the size, hook pattern, barb choice and strength before purchasing.
You don't need a rig ring, bait floss, hook bead, bait screw or tungsten putty for this particular sinking-bait rig. Nor is a leader compulsory. Buying a large terminal-tackle bundle can make learning harder if its unlabelled parts cannot be matched confidently to a manufacturer's complete arrangement.
Choose the hook and kicker together
Start with the actual hook, not an imagined average size. Two different patterns carrying the same size number can have different eye diameters, wire thicknesses and shank shapes. Read our hook-size and pattern guide before substituting a much smaller or larger hook in an otherwise unchanged rig.
A suitable kicker seats firmly without splitting, leaves the point and gape clear and allows the exposed braid beyond it to move. If fitting it takes excessive force, stop and recheck the size. If it slides freely when it should grip, don't rely on glue to rescue the mismatch. The length of the visible extension also matters: stacking two kickers is not a manufacturer-approved way to create a stronger effect.
Check the hook eye for a rough edge before tying. Damage hidden beneath an attractive rubber sleeve remains damage. Similarly, never use an extended piece of tubing to conceal badly crossed whipping. The rig should be sound before the covering component goes into place.
How to tie the simple kicker version
- Prepare the braid. Cut roughly 30cm to give yourself working room. Strip enough coating for the hair, knot and short supple section beyond the finished kicker, using the stripper without nicking the inner fibres.
- Fit the actual bait. Make a small hair loop, thread the sinking boilie onto it and secure the bait stop. Work with the bait you'll fish, because its size determines the required clearance.
- Set the hair. Hold it along the back of the hook and begin with around 5–10mm of space between bait and bend. Use this as a starting point, then check that your bait leaves the hook point clear.
- Tie the knotless knot. Follow the full hair-rig sequence, making neat adjacent turns and arranging the final hooklink exit on the point side of the eye. Moisten and tighten evenly.
- Check the uncovered connection. Inspect both sides and pull-test it with tools before sliding anything over it. Remake a slipping knot or damaged section.
- Seat the kicker. Thread the correctly sized part down the hooklink and fit it over the eye in its intended orientation. Keep the opening and point clear and retain the short flexible section outside it.
- Finish the lead end. Add the anti-tangle sleeve before tying the appropriate loop for the compatible quick-change swivel. Around 15–20cm is a manageable initial finished length on a clean spot; use the maker's direct knot connection instead where required.
- Test the complete baited rig. Pull-test the finished connections, lower it into water and inspect the bait, hair and hook. Finally assemble and test the separate complete lead system.
Check that the hair has not been dragged under the wrong turn while tightening. A neat-looking line of whipping is not enough if the bait attachment crosses the gape. Use magnification or good light when learning; small errors are easier to remake at a table than to diagnose after several casts.
Adding a silicone-controlled hair: the flipper variation
The separate flipper arrangement positions the hair with a small section of silicone on the hook. Korda's bottom-bait/flipper demonstration shows its own Dark Matter coated-braid rig with silicone and shrink tubing. Watch the sequence to see the hair route and intended silicone position; our N-Trap and purpose-made-kicker list is an alternative material combination, not a claim that all coated braids and tubing sizes are identical.
Additional part for silicone hair control
Add Korda medium silicone tubing (paid link) matched to the Wide Gape hook. Retain the hook, N-Trap Soft, bait stop, sinking bait and matched kicker from the simple list. This version doesn't need a blowback ring. If following the manufacturer's shrink-tube version instead, use its specified tubing and steaming procedure; don't stack that extension underneath the kicker.
With the bait already on the hair, thread a short silicone section onto the braid. Carefully pass the hook point through the tubing without piercing the braid, move it into the demonstrated hair-control position and set the bait gap. Tie the hook securely, finish the eye extension and inspect the hair again. Korda's example uses about 4mm of silicone; grip and correct positioning on the chosen hook matter more than copying a measurement onto a different diameter tube.
The silicone must hold the intended hair exit without damaging the braid or forcing it into the point. A punctured hair can look intact until pressure is applied. If you suspect the point has caught a fibre, replace the damaged section. After a retrieve, displaced silicone is a prompt to investigate its grip and the bait's movement, not evidence of a definite unseen take.
Bait choice, hair length and the water check
A genuinely sinking boilie is the clearest starting bait here. Put the assembled rig in a clear container and watch the bait and hook settle with slack available. The bait should not wedge against the bend or cover the point. Lift it by the bait and by the hooklink in turn, then let it settle again so you can see whether the hair repeatedly catches around the hook.
Adding a buoyant topper makes a snowman and changes the combined weight. Replacing the sinking bait with a wafter also changes the test. Neither alteration is automatically wrong, but both require checking with the exact hook. A smaller hook and a strongly buoyant bait can behave very differently from the original bottom-bait rig.
Hair length is best treated as clearance with the real bait fitted, not a number to preserve at any cost. If the bait crowds the hook, increase the separation and retest; if the hair repeatedly wraps around the hook, consider whether it is unnecessarily long or whether the cast is the problem. Change one thing at a time so that any improvement is interpretable.
Leave a sample bait soaking when practical and test again. Hookbait texture and buoyancy can alter during a session. A sharp hook is no compensation for a bait that has become loose on the hair or a stop disappearing into an enlarged hole.
What a turning test can and cannot tell you
A hook turning during a demonstration can show that a particular arrangement rotates under that particular pull. It doesn't reproduce a carp feeding around debris, the direction of water movement or every position in which the hookbait may be picked up. Avoid using your palm or fingers as a surface for a sharp-hook demonstration. Inspect movement in water and with appropriate tools instead.
Before changing the kicker's shape, identify the actual fault. If the bait crowds the bend, the first question is hair clearance. If the hooklink catches around the lead, look at casting and the lead-end connection. If the hook point is damaged, replace the hook. None of those faults is usefully diagnosed by making a rubber extension longer until the hook appears to turn more dramatically.
A useful reference record lists the hook pattern and size, kicker size, hooklink material, finished length, approximate exposed-braid length and bait diameter. Photograph the finished baited rig from both sides. This is particularly helpful when comparing an ordinary hair with the silicone-controlled flipper: you can see whether the change really is the hair exit or whether you also changed three other variables unintentionally. Keep the record with the rig rather than relying on memory after a long break between sessions.
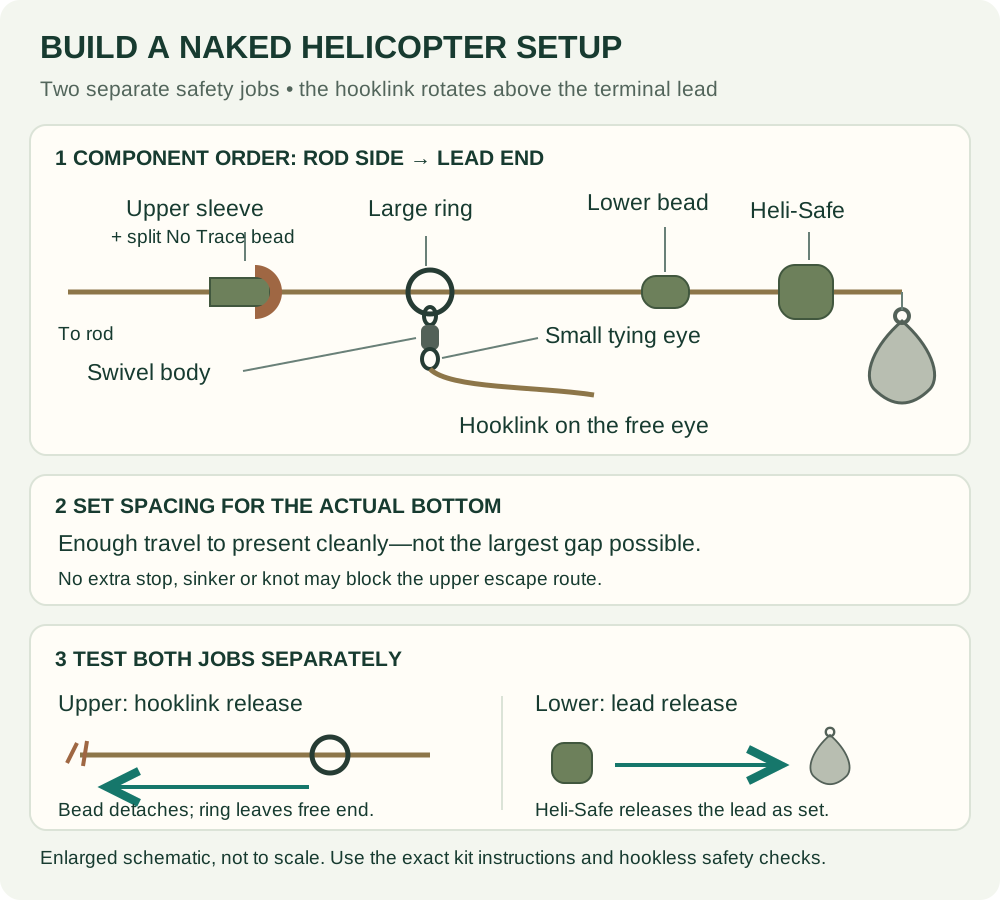
The lead arrangement is a separate safety decision
One compatible complete example
A Korda Lead Clip Action Pack (paid link), a compatible swivel lead (paid link) within the rod's casting capability and suitable main line (paid link) provide a starting component list. Check the pack's actual contents and current manufacturer assembly instructions. Use its matched swivel unless the exact quick-change replacement is approved for that clip.
Follow our safe lead-systems guide and the manufacturer's lead-system explanation. A hooklink fitted to the wrong swivel or an over-tight tail rubber can create a safety problem that the hook-end diagram cannot reveal.
Test both the intended lead-release behaviour and what happens after a main-line break. These are related but not identical questions. Don't add permanent stops, glue a sleeve into place or assume that any leader will pass safely through every component. If the complete arrangement is unfamiliar, ask a competent fishery team member to inspect it before fishing.
Casting, landing and checking the retrieved rig
Begin with controlled casts at a distance you can place accurately. Watch the rig's flight where possible and slow it appropriately before it reaches the water so the hooklink has a chance to extend. A violent last-second stop can create its own problems; practise with a safe, clear casting area and keep hooks away from people and clothing.
The supple section can fold back around the lead if the cast collapses. A kicker cannot guarantee a tangle-free result. If you repeatedly recover tangles, inspect the whole cast, hooklink length and lead-end sleeve rather than buying a longer eye extension. Our rig-tangle troubleshooting guide helps separate those causes.
After contact with weed, gravel or a fish, check the point, hair, exposed braid and kicker. Look underneath the rubber when necessary. Replace a split kicker and remake abraded hooklinks. Don't automatically push every displaced component back into place and recast without understanding why it moved.
Line-aligner and flipper troubleshooting
| What you find | What to check | What not to do |
|---|---|---|
| Kicker splits or will not seat | Specified hook size, eye and kicker size | Force it or glue the split together |
| Bait masks the hook | Actual bait diameter and hair clearance | Keep an unsuitable hair because it matches a measurement |
| Silicone repeatedly moves | Tubing grip, position and hair route | Interpret every movement as a definite bite |
| Braid frays near the silicone | Whether the point pierced fibres during assembly | Hide the damage with extra tubing |
| Hooklink tangles in flight | Casting control, supple length and lead-end connection | Assume an aggressive kicker fixes everything |
| Point appears covered or blunted | Rubber placement, damage and debris | Use your skin as a sharpness test |
| Hook rises with the bait | Buoyancy after changing or soaking the hookbait | Assume every bait labelled wafter balances identically |
Frequently asked questions
Is a kicker necessary on every hair rig?
No. The ordinary hair rig can be tied without one. Learn its correct knot and hair position first. A kicker is an optional part of a defined rig, not a badge proving that a rig is finished. If the unmodified rig is presenting properly, decide what you want the extra component to change before fitting it.
Is a line-aligner the same as a flipper rig?
No. The line-aligner or kicker affects the hooklink's route at the eye. The flipper's silicone controls the hair exit farther along the hook. Some complete rigs use both ideas, which explains why the names are sometimes used loosely.
Can I use a pop-up on this rig?
Not by swapping the bait and assuming the rest remains correct. A pop-up needs an appropriate counterbalanced presentation. If you specifically want a low pop-up, learn a complete tested spinner/Ronnie setup rather than improvising an unweighted buoyant version of this bottom-bait rig.
Should I steam a ready-made kicker?
Follow the actual product instructions. The purpose-made kicker in this guide avoids the shrink-tube shaping stage. Don't apply a naked flame to rubber covering a load-bearing connection, and don't assume that all sleeves require the same treatment.
Can I crimp the N-Trap hooklink?
No crimped connection is specified here. Use the demonstrated knots. The fact that a different coated material appears in a crimped rig doesn't establish that N-Trap is compatible with those crimps.
How can I compare the two hair arrangements fairly?
First make each safely and consistently. Use the same permitted hook, bait and spot where possible, and record the difference you're testing. Don't treat a single catch or blank session as proof of a rig's superiority; location, feeding and conditions still affect what happens.
Before your first cast
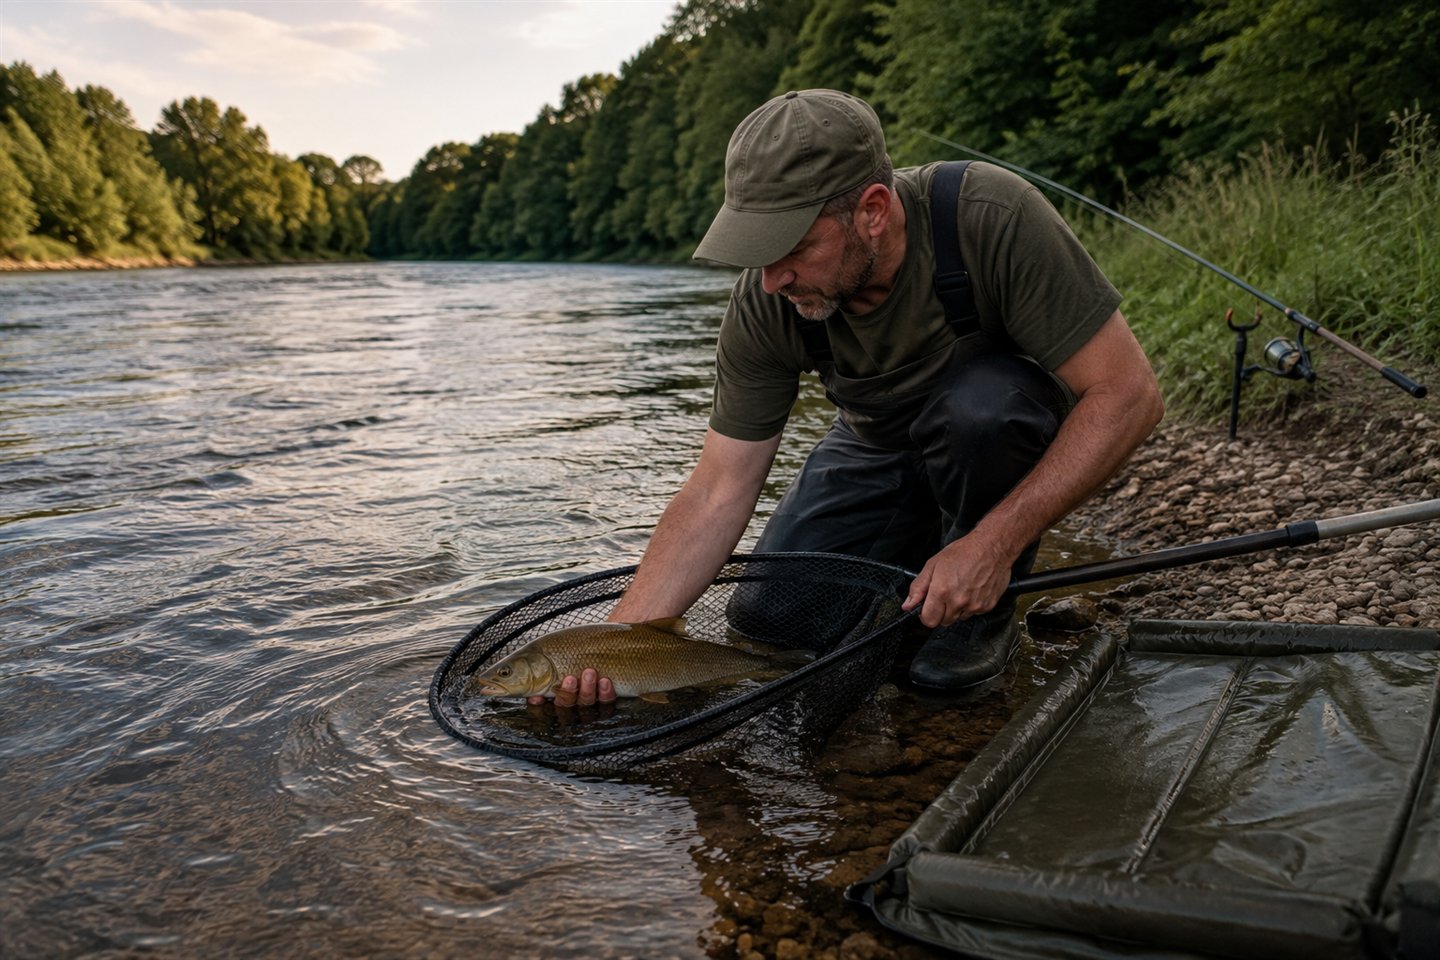
Before casting, check the knot, kicker, bait clearance and full lead setup against the venue rules. On the flipper version, look carefully at the hair's route through the silicone too. Have the net and wet mat ready, with a clear way to land a fish. Get those basics right before experimenting with more dramatic hook angles.
Use the manufacturer demonstrations below alongside the tying instructions. The original illustration explains components rather than knot detail. Use the linked manufacturer demonstration when learning the silicone-controlled version, and retain the simpler hair rig whenever it is the presentation you understand best.